Woo Commerce
Installing the Plugin
Integrating Credova Financing with your WooCommerce site is very easy. All you need to do after installing the plugin is to configure it with the user-friendly interface. The installation instructions are provided below.
Automatic Plugin Installation
-
Navigate to Plugins > Add New.
-
Use the search form in the top-right to search by keyword Credova Financial, author or tag.
-
On the search results that appear, click a plugin's title to read more about it. This page may contain installation notes, plugin documentation or other useful information.
-
Click the Install Now button to install the plugin.
-
Click Activate to activate the plugin.
Manual Upload
This process may put your site at risk if you install a WordPress plugin incompatible with the current version or from an unreliable source. Back up your site completely before proceeding.
-
If your plugin is in the form of a zip file, unzip the contents. You should see a single folder named after the plugin.
-
Look in the plugin folder for a readme.txt file. Read the file to confirm that this is the correct plugin, and to look for any special instructions.
-
Connect to your WordPress server with your SFTP client.
-
Copy the plugin folder to the wp-content/plugins folder in your WordPress directory. This installs the plugin to your WordPress site.
-
Navigate to your Plugins admin screen and locate the newly uploaded plugin in the list.
-
Click the plugin's “Activate” link.
-
If there is one, click the plugin's “View details” link to learn more about the plugin.
Plugin Setup and Configurations
Fill your Credova store configuration here and Save the details so that it can be used by the plugin on your website frontend.
- Go to WooCommerce -> Settings -> Payments -> Credova
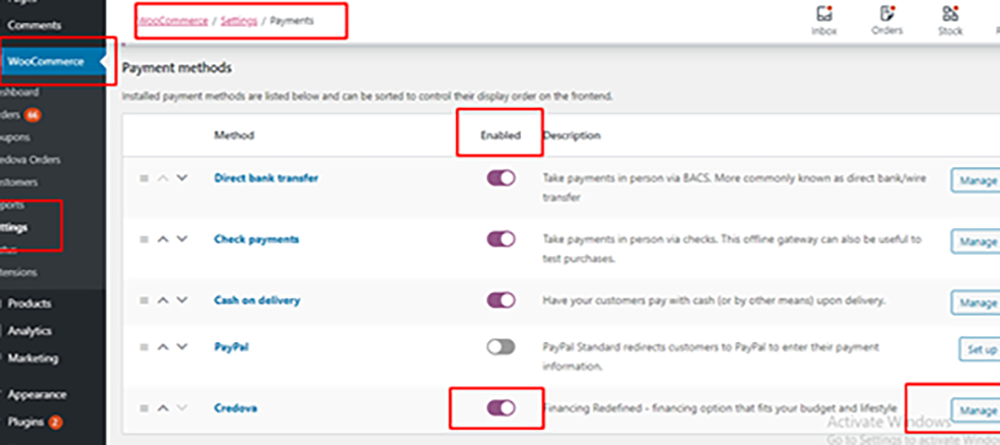
- Click Manage next to Credova.
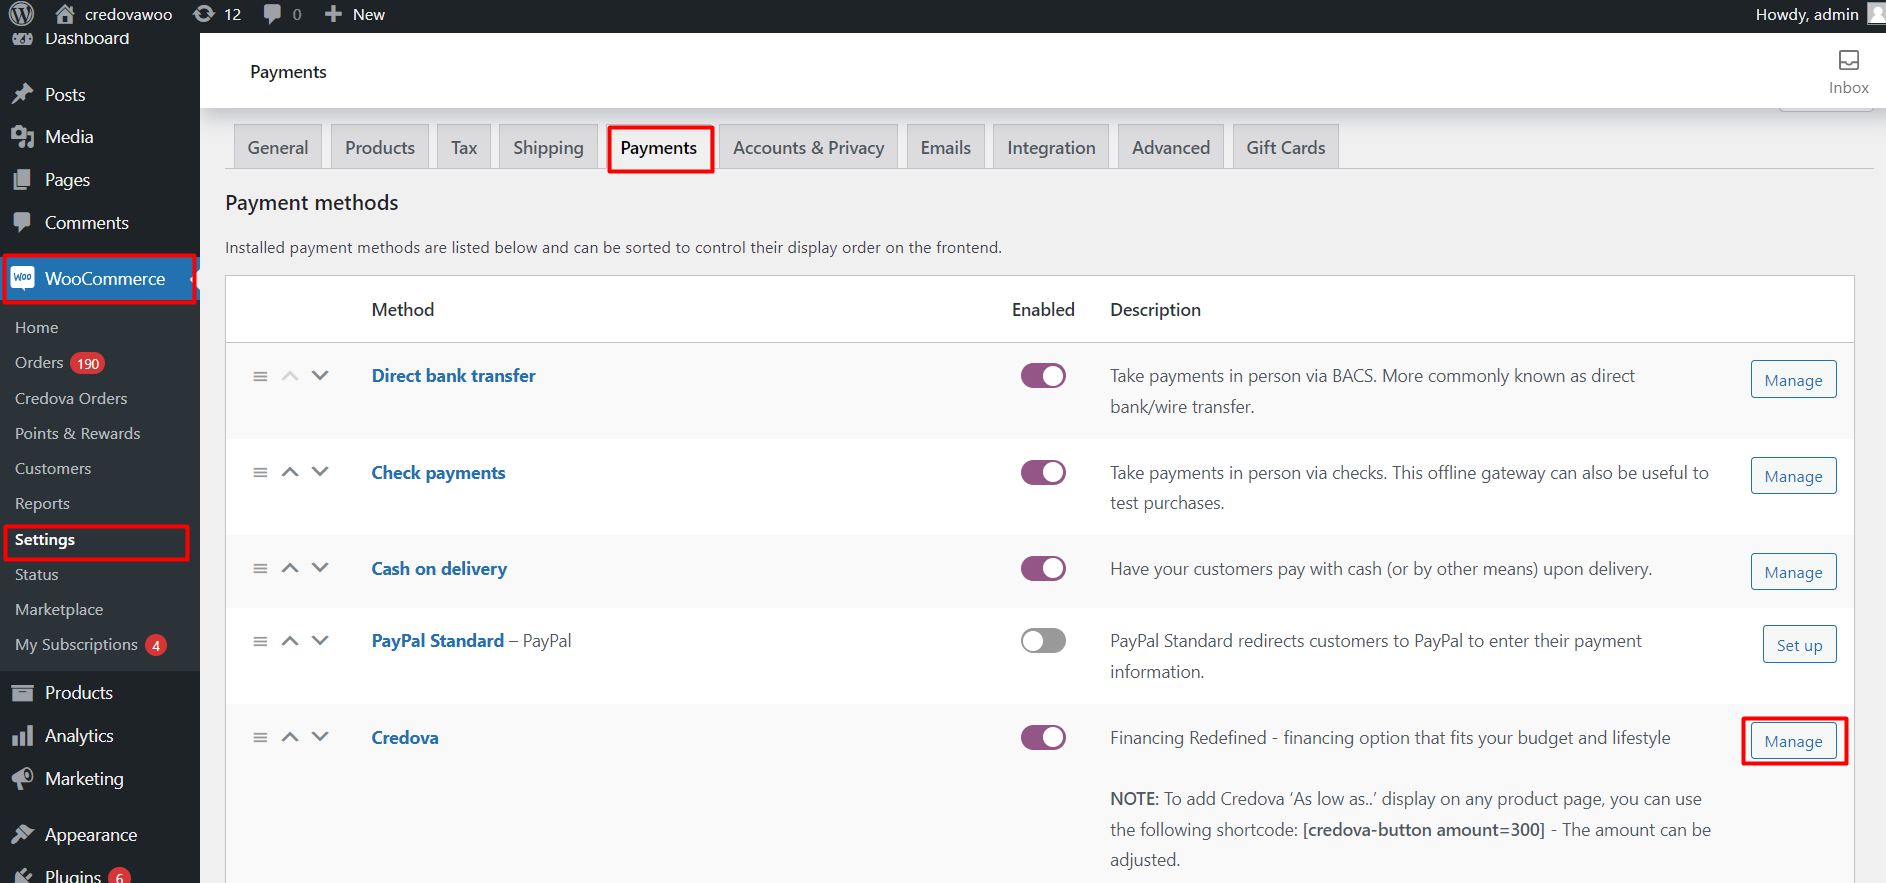
- Add all your configurations and save changes. The description and recommended values are defined in the table below:
| Setting Name | Setting Value & Description |
|---|---|
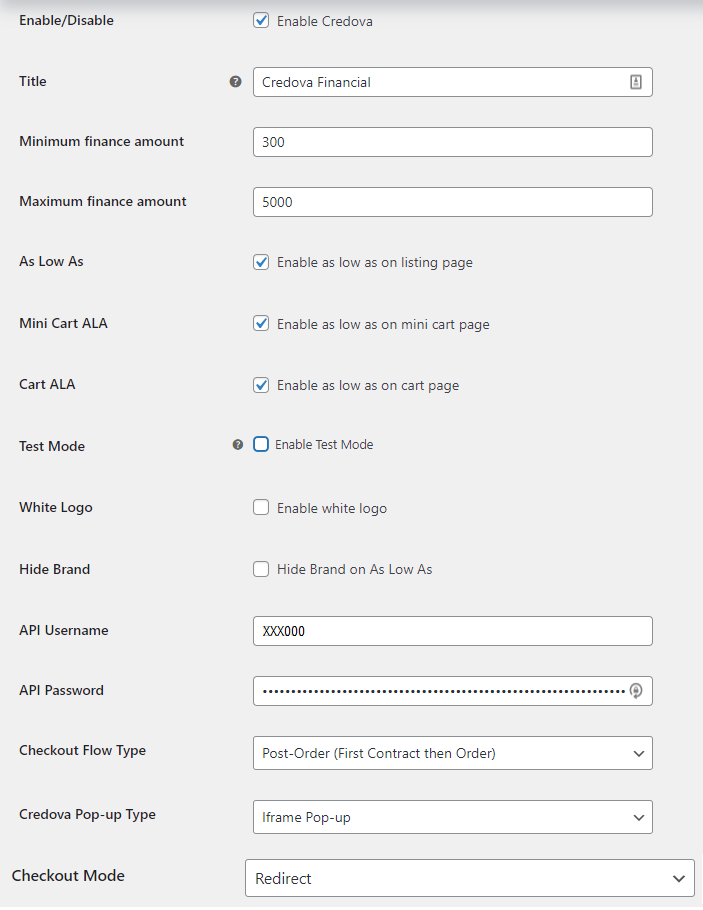
| Enable/Disable | Checked This enables Credova app to be used on your site |
| Title | Credova |
| Minimum Finance Amount | $300 Credova will not display on products less than this dollar amount. Credova currently does not finance anything under $300 but can be displayed on items as low as $50. |
| Maximum Finance Amount | $5,000 Credova will not display on products greater than this dollar amount. Credova currently does not finance anything over $5000 but can be displayed on items above this amount. |
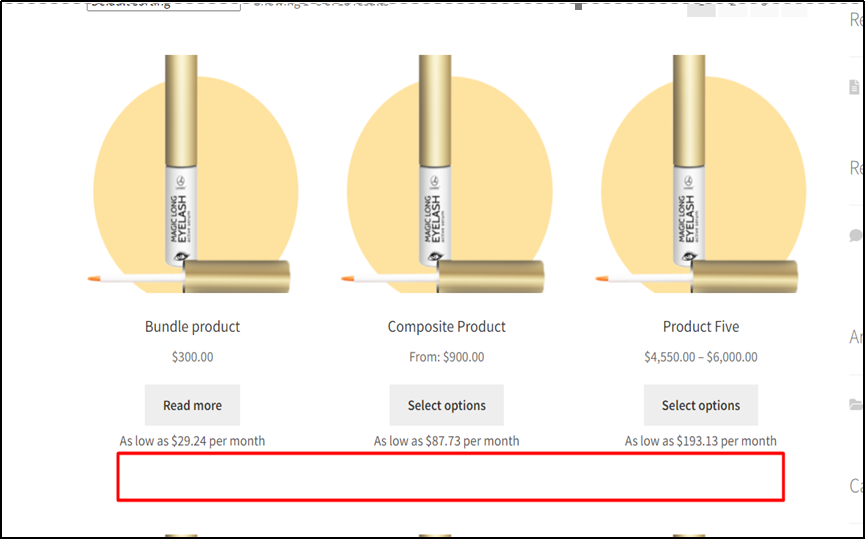
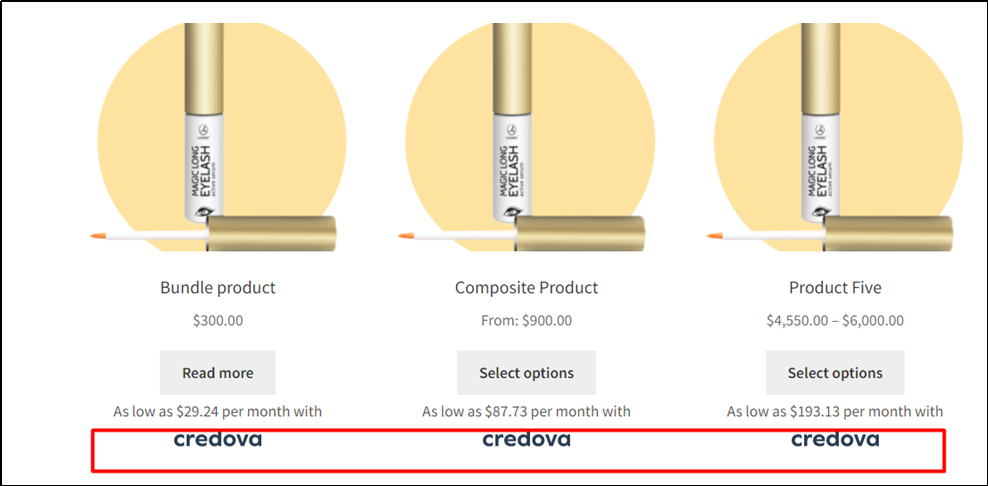
| As Low As | Checked This will show Credova on product listing pages (PLP) when parameters of price are met. |
| Mini Cart As Low As | Checked This will display Credova within the mini cart view. 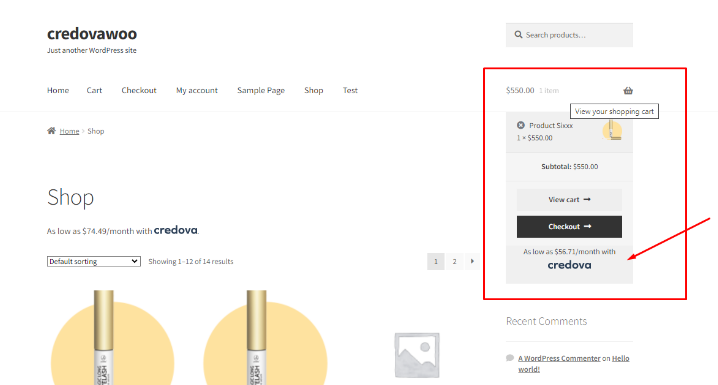 |
| Cart As Low As | Checked This will display Credova in the cart before moving to checkout. 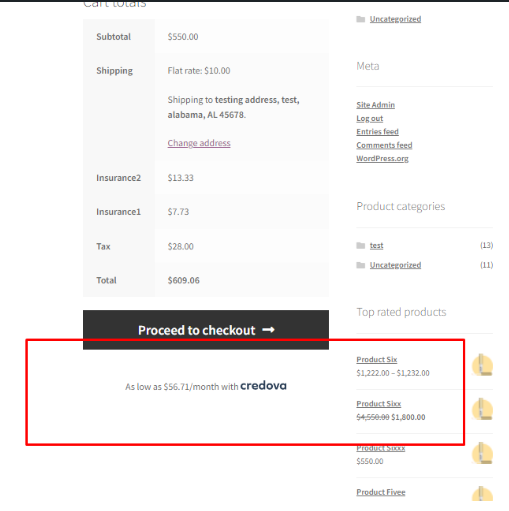 |
| Enable Test Mode | Checked while in testing/sandbox mode for a staging server. Uncheck when deploying on live site/production mode. |
| White Logo | Provides the ability to use a white Credova logo when site background is a dark color. |
| Hide Brand | Check to hide the Credova logo on As Low As display on PLP and product detail pages or keep unchecked to show Credova branding. |
| API Username | Usually a mix of 6 alphanumeric characters. The API username can be found here: https://lending.credova.com/ApiIntegration/Credentials |
| API Password | Usually, a random mix of 64 alphanumeric characters and symbols. The API password can be found here: https://lending.credova.com/ApiIntegration/Credentials |
| Checkout Flow Type | Post-Order (First Contract then Order) This is the sequence in which orders are posted to the Woo Commerce system. Typically, the order is posted after the contract is signed. Posting the order first creates a pending order status. |
| Credova Pop-up Type | Iframe Pop-up or Pop-up. Iframe Pop-up is recommended because traditional Pop-ups can be blocked by browsers. |
| Checkout Mode | Redirect is recommended. This will open Credova in the same window. Modal opens Credova in a new tab. |
- Click Save Changes.
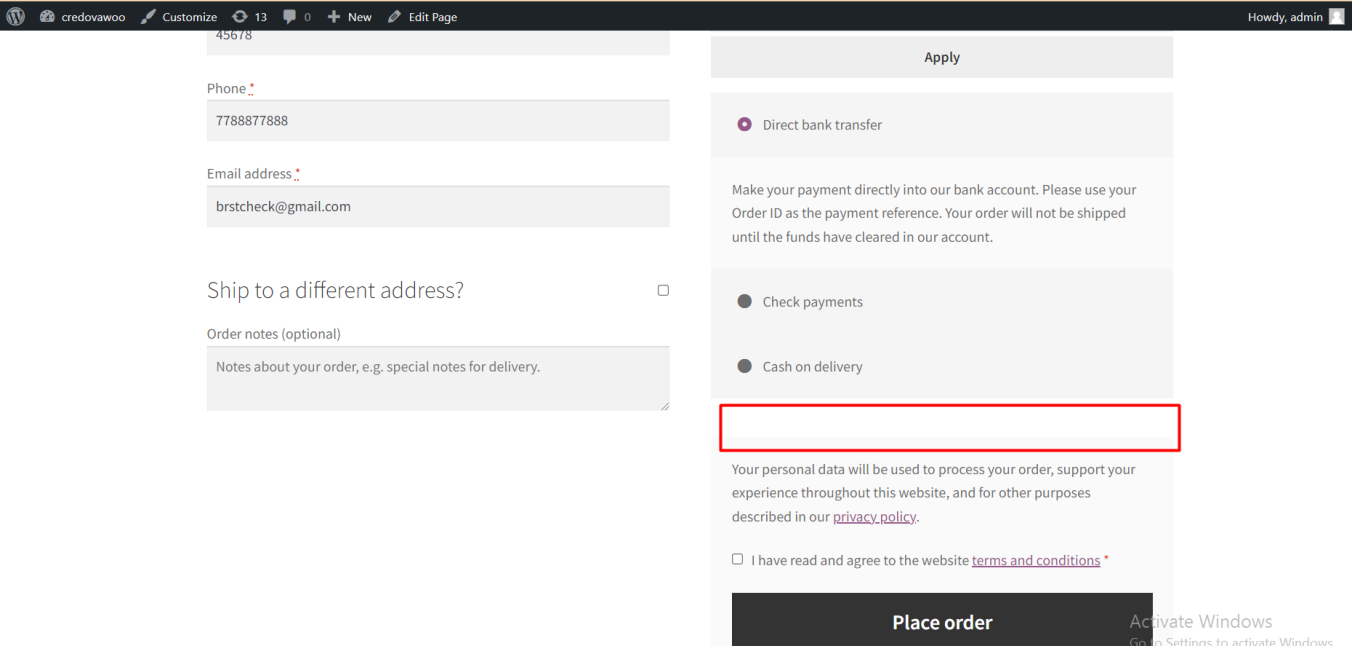
- You should now see Credova Financing offers on products and at checkout.
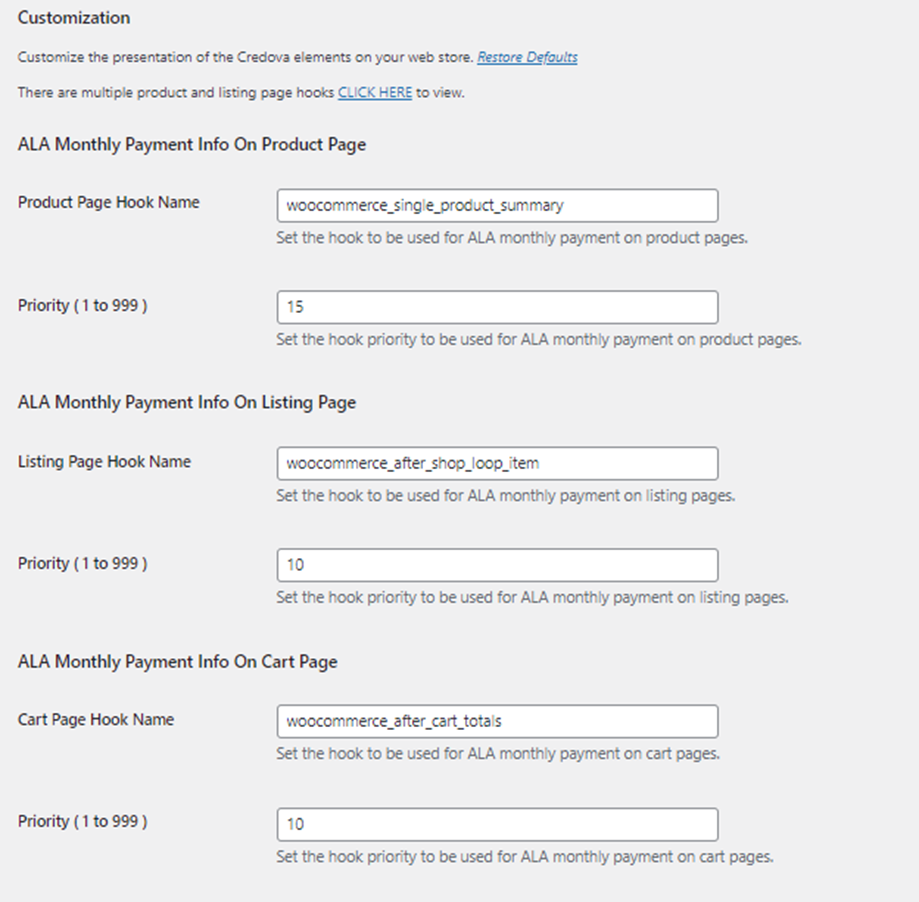
Customization
This section allows for customization of the location of ALA on your product pages and the cart page by updating the hook names. You can visually see where each hook is here for the product pages and here for the cart. Priority is used to display the order of the hook if/when there is another plugin using the same name. The lower the priority, the higher the Credova ALA.
|
Screenshots
Hide Brand


Plugin Customizations
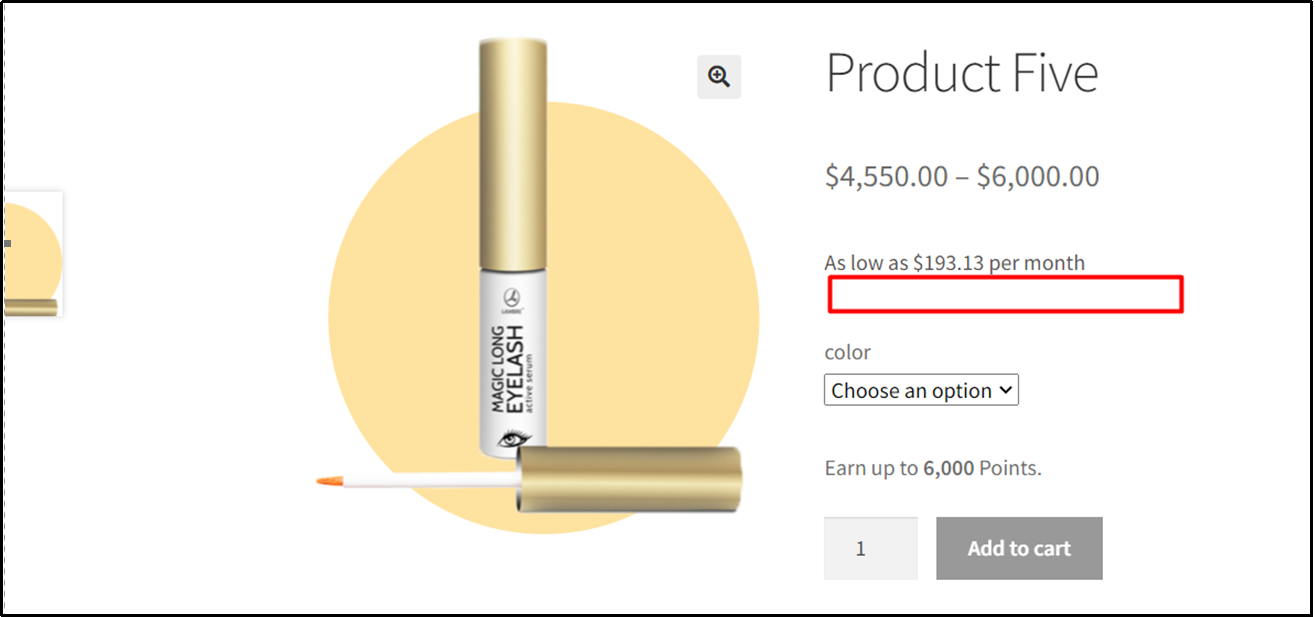
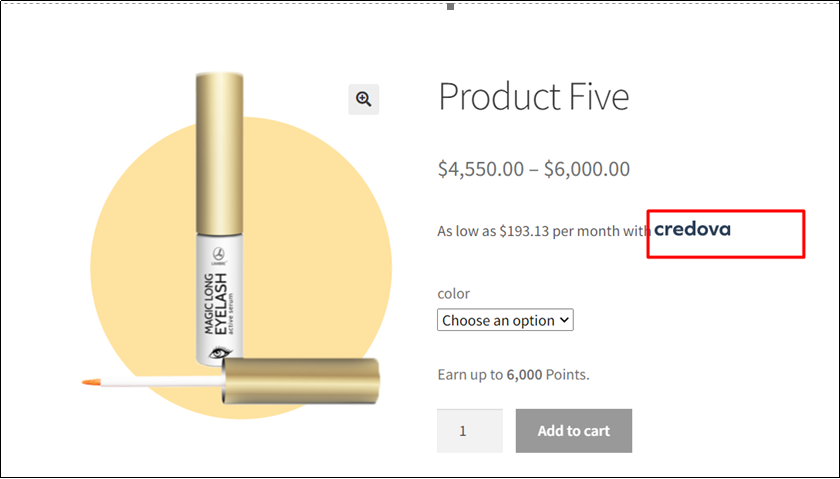
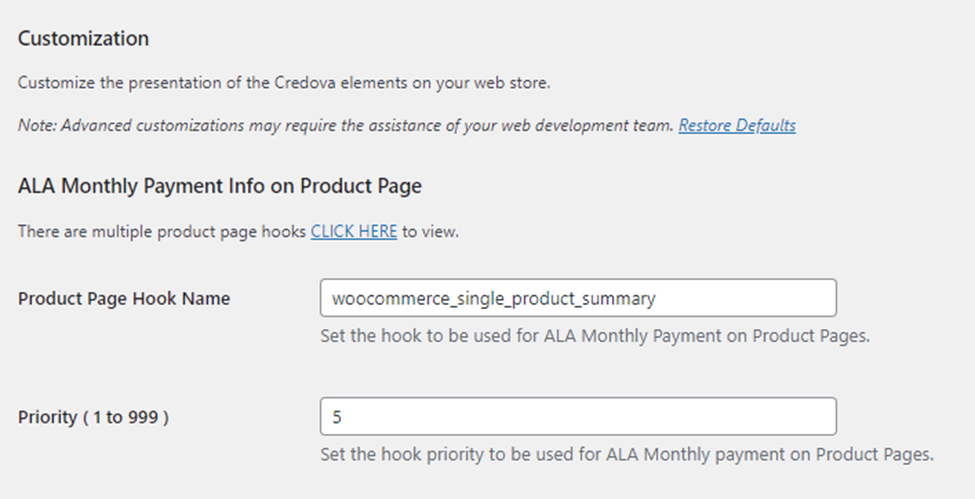
This section allows for customization of the location of ALA on your product detail pages by updating the product page hook name.
CLICK HERE to copy and paste the available hooks into the Product Page Hook Name. You can visually see where each hook is here.
Priority is used to display the order of the hook if/when there is another plugin using the same name. The lower the priority, the higher the Credova ALA.
Further Customization
Credova ALA on Any Page
Displaying Credova 'As low as' on any page of your website allows you to promote the 'As low as' message on non-product related pages. The 'As low as' price will reflect the amount entered as the short code in the widget. This can be accomplished by going to:
- Go to Appearance -> Widgets.
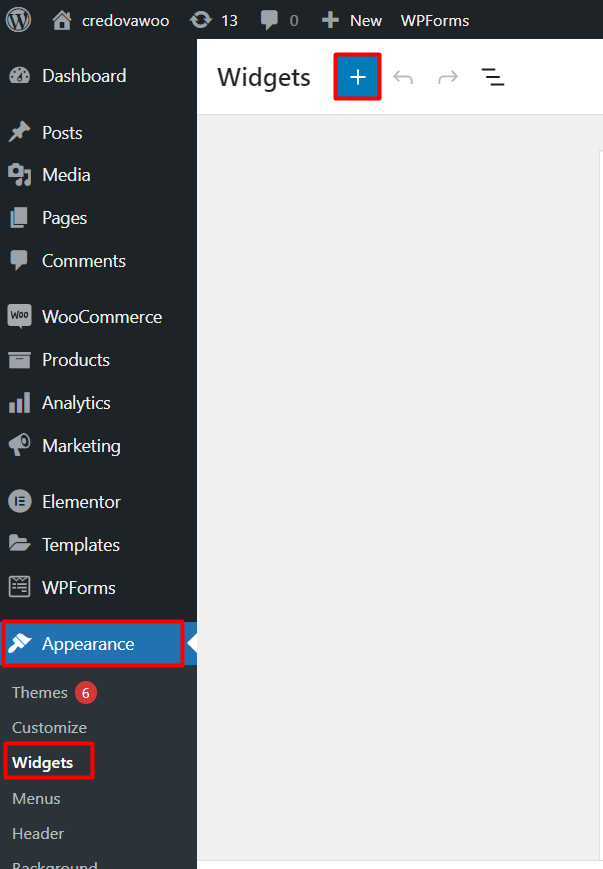
- Click + sign and click on Short code.
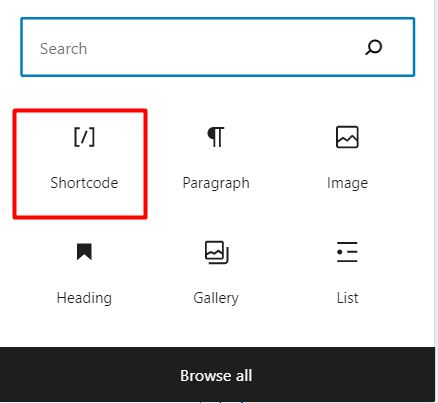
- Copy and paste the following shortcode:
[credova-button amount=“300”]

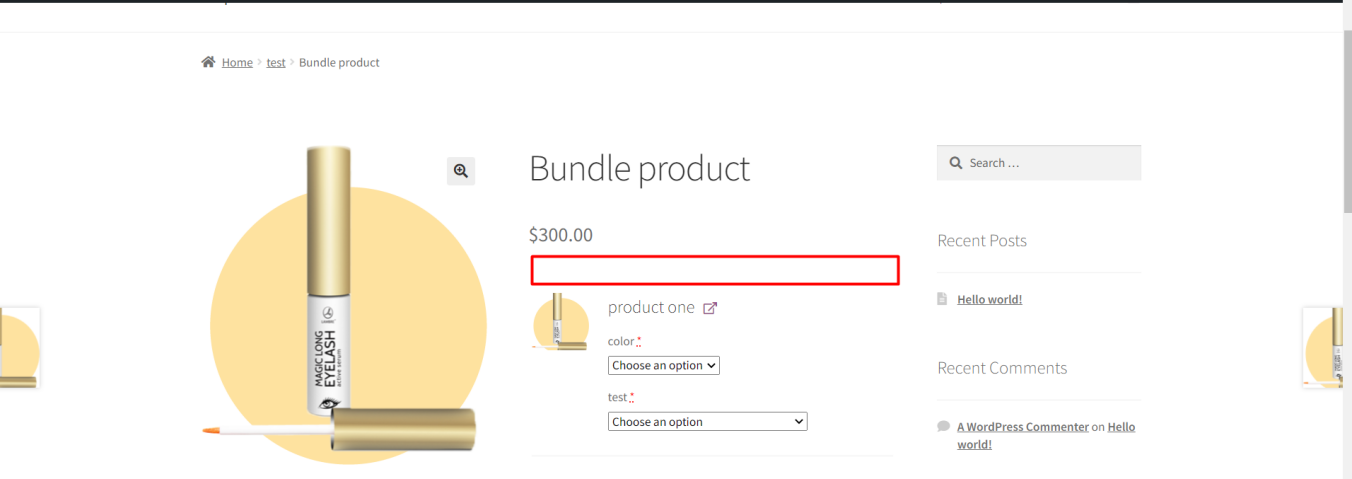
The amount can be adjusted to a minimum of $50 and maximum of $5000. The widget will appear with the As low as amount based on the amount entered in the short code as seen below:

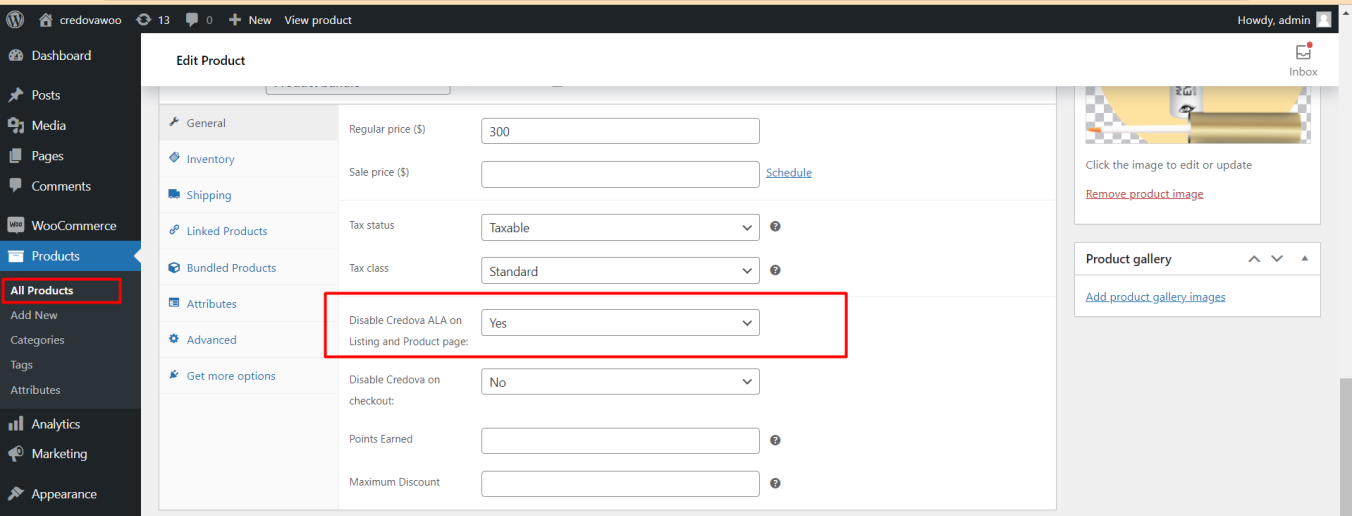
Disable as low as from Specific Product Detail Page (PDP) and Product Listing Page (PLP)
The Credova ALA display can be removed for particular products by going to the product and choosing Yes next to Disable Credova ALA on Listing and Product page as shown below.
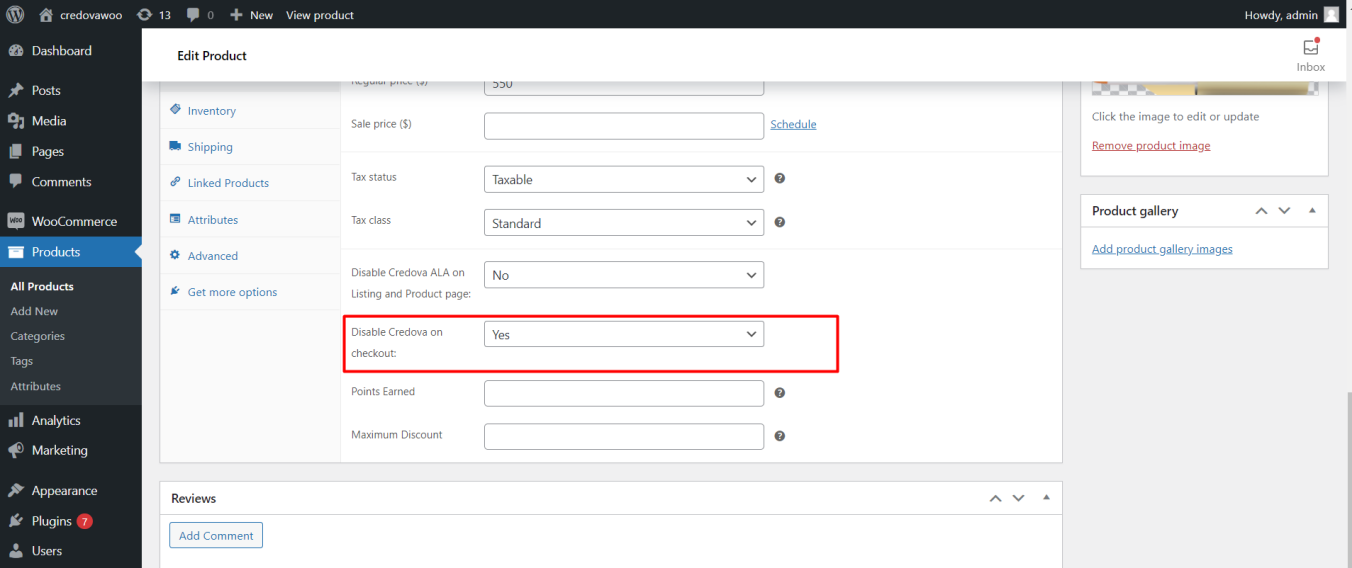
Hide Credova at Checkout for Specific Products
The Credova payment option can be removed from checkout for specific products as well. To disable Credova for particular items in the cart, choose Yes for Disable Credova on checkout for the desired items.
If a cart contains items where any of the products is disabled, the cart will not show Credova as a payment option.
It is recommended if Credova disabled in the cart then it should disable at PDP/PLP as well.
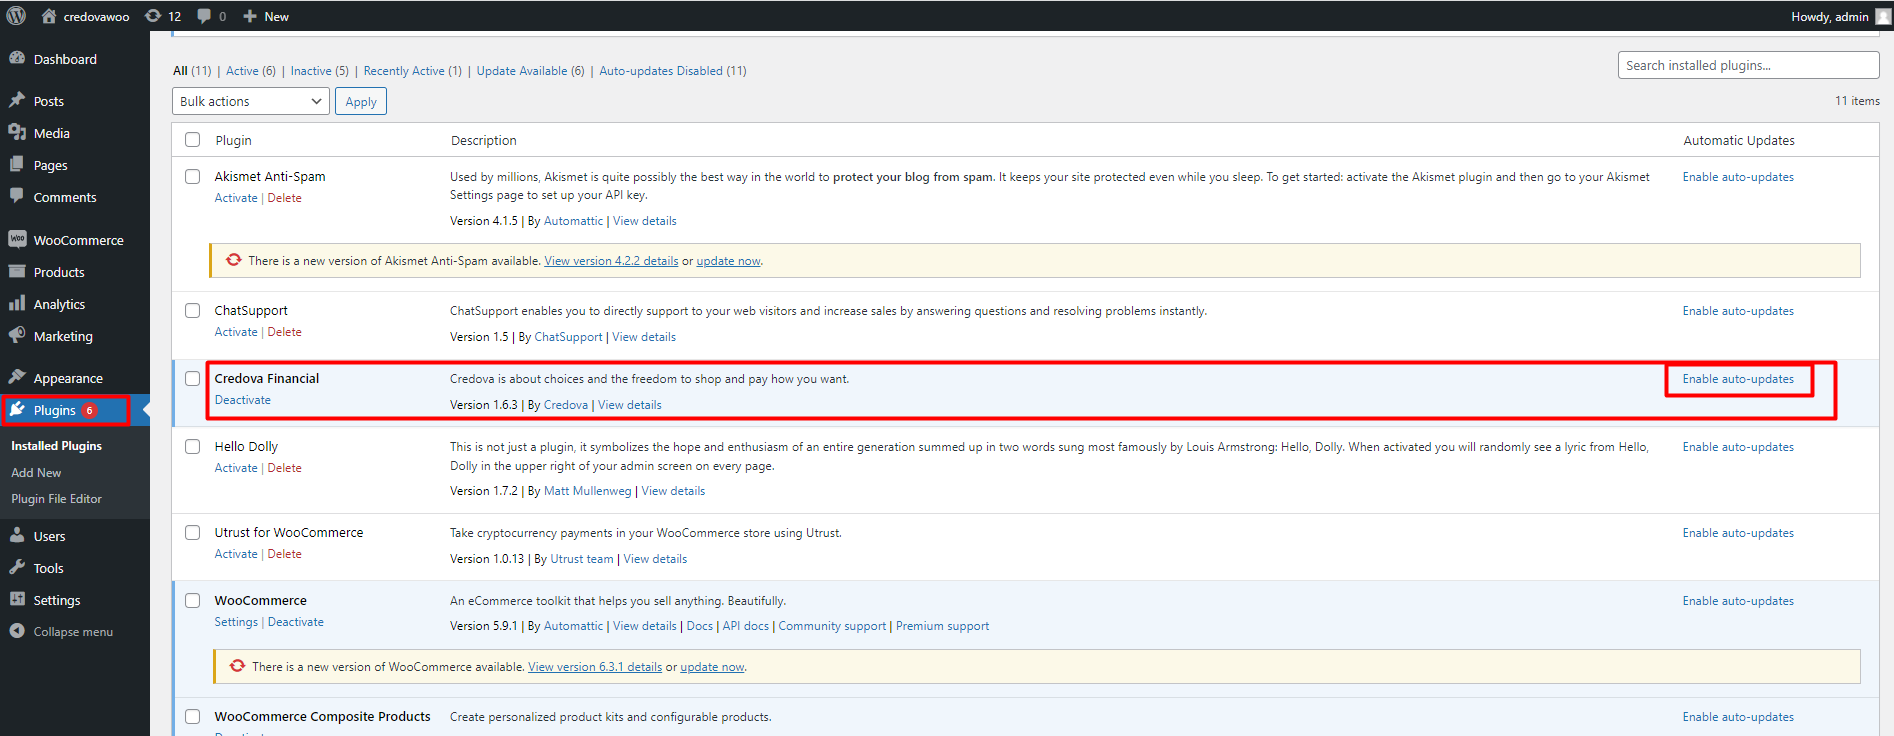
Enable Auto Updates
It is recommended to enable auto updates of the Credova plugin to ensure you are using the most up to date, secure application on your website.
Orders, Returns and Logs
Orders
Click on an order to see Order Notes
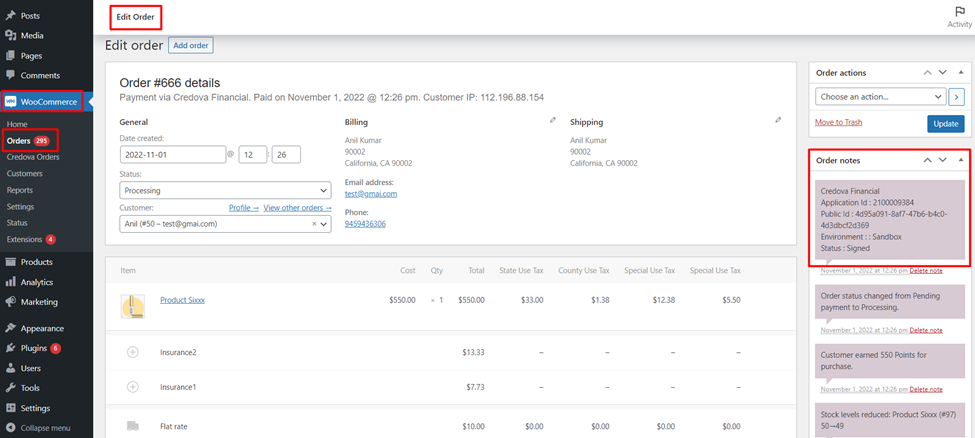
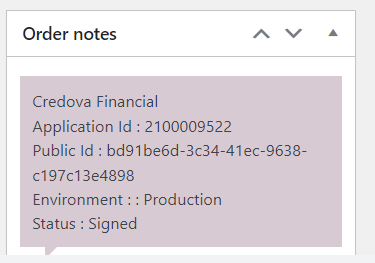
Credova order notes display on the right-hand side. Every valid Credova will include:
- Application ID, Public ID, Environment: Production, and Status: Signed.
Application ID and Public ID will be different for every order.
An order where Environment: Sandbox is NOT a valid Credova order.
Credova and Returns
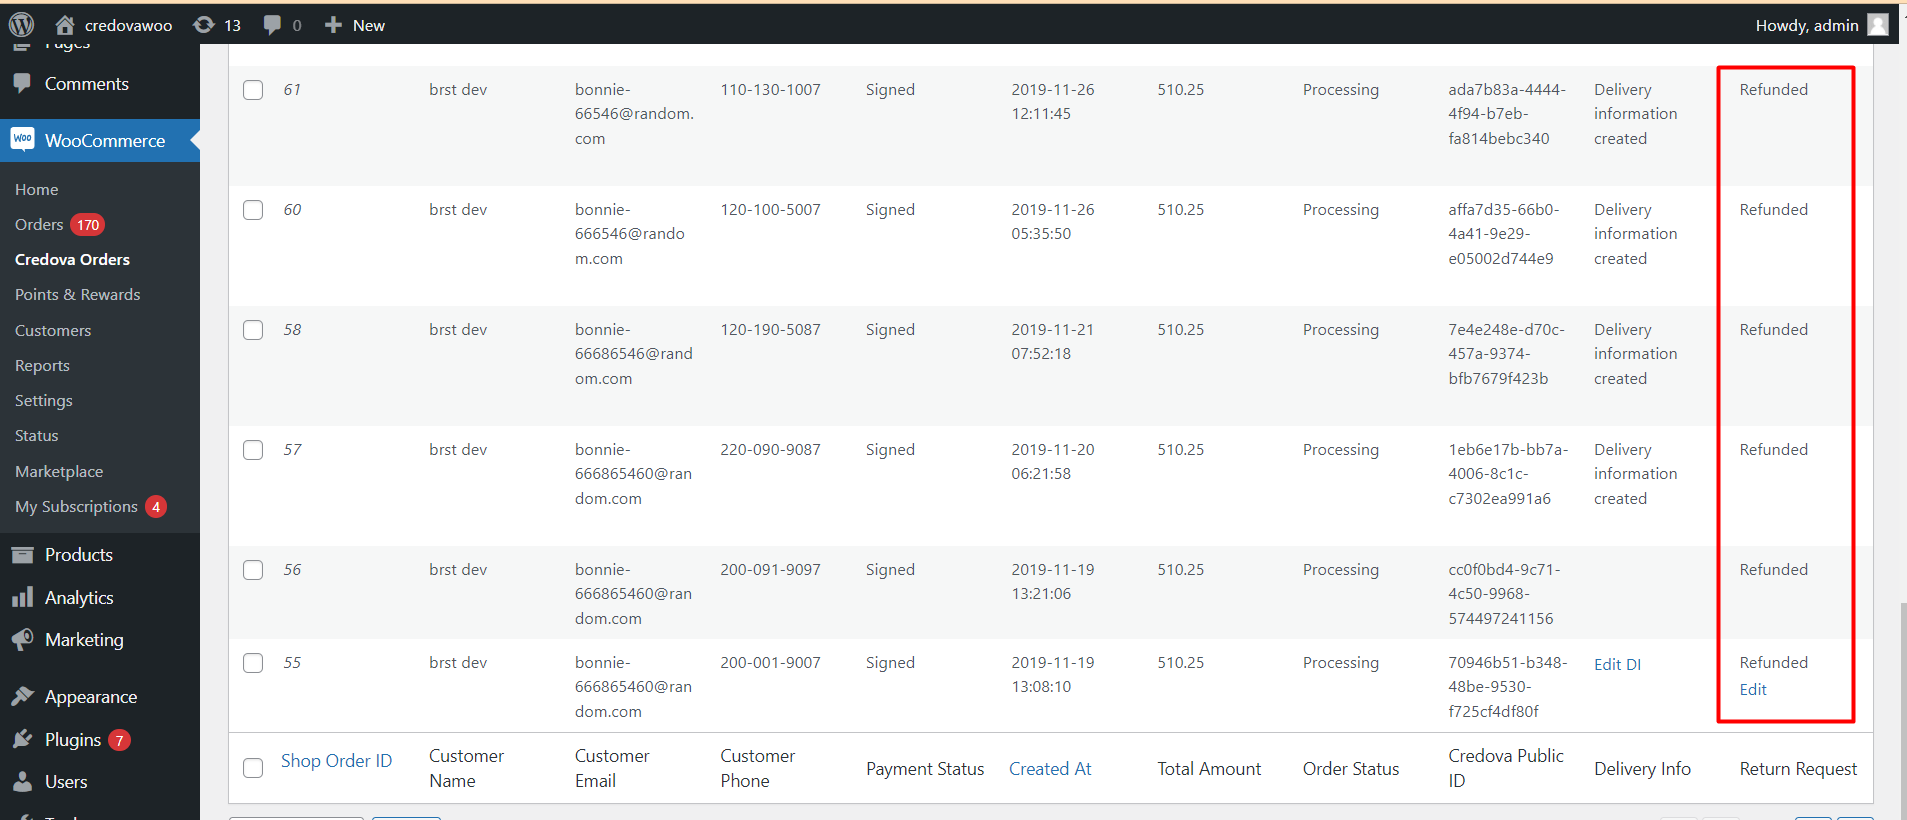
To view Credova orders select “WooCommerce” and then Credova Orders as shown below.

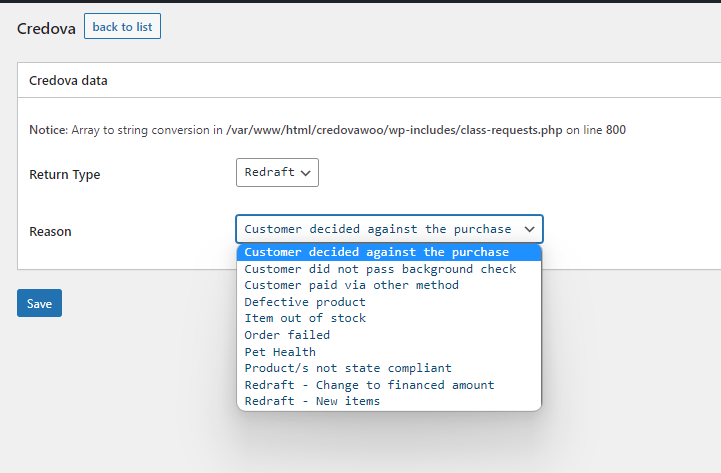
Here recent orders can be viewed, and a Return request can be initiated by hovering over the order and selecting edit.
To initiate a return, select the return type (redraft or return), the return reason and then save. The return request will be sent to the Credova server, and the information will appear in the Credova Merchant Portal. For accepted returns the contract will be canceled.
If Redraft is selected for the return type, a new contract will need to be redrafted within the Credova in the portal.
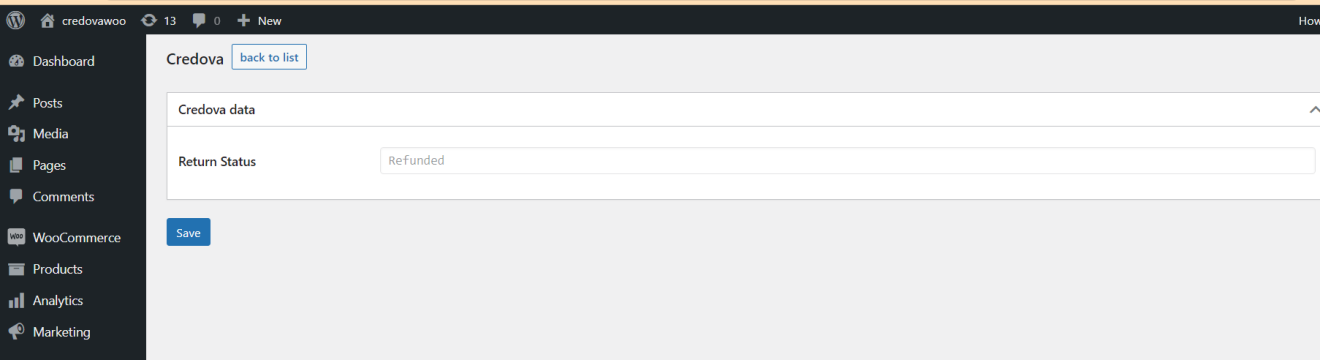
Refunds
Once a return is complete, the status will display as refunded.
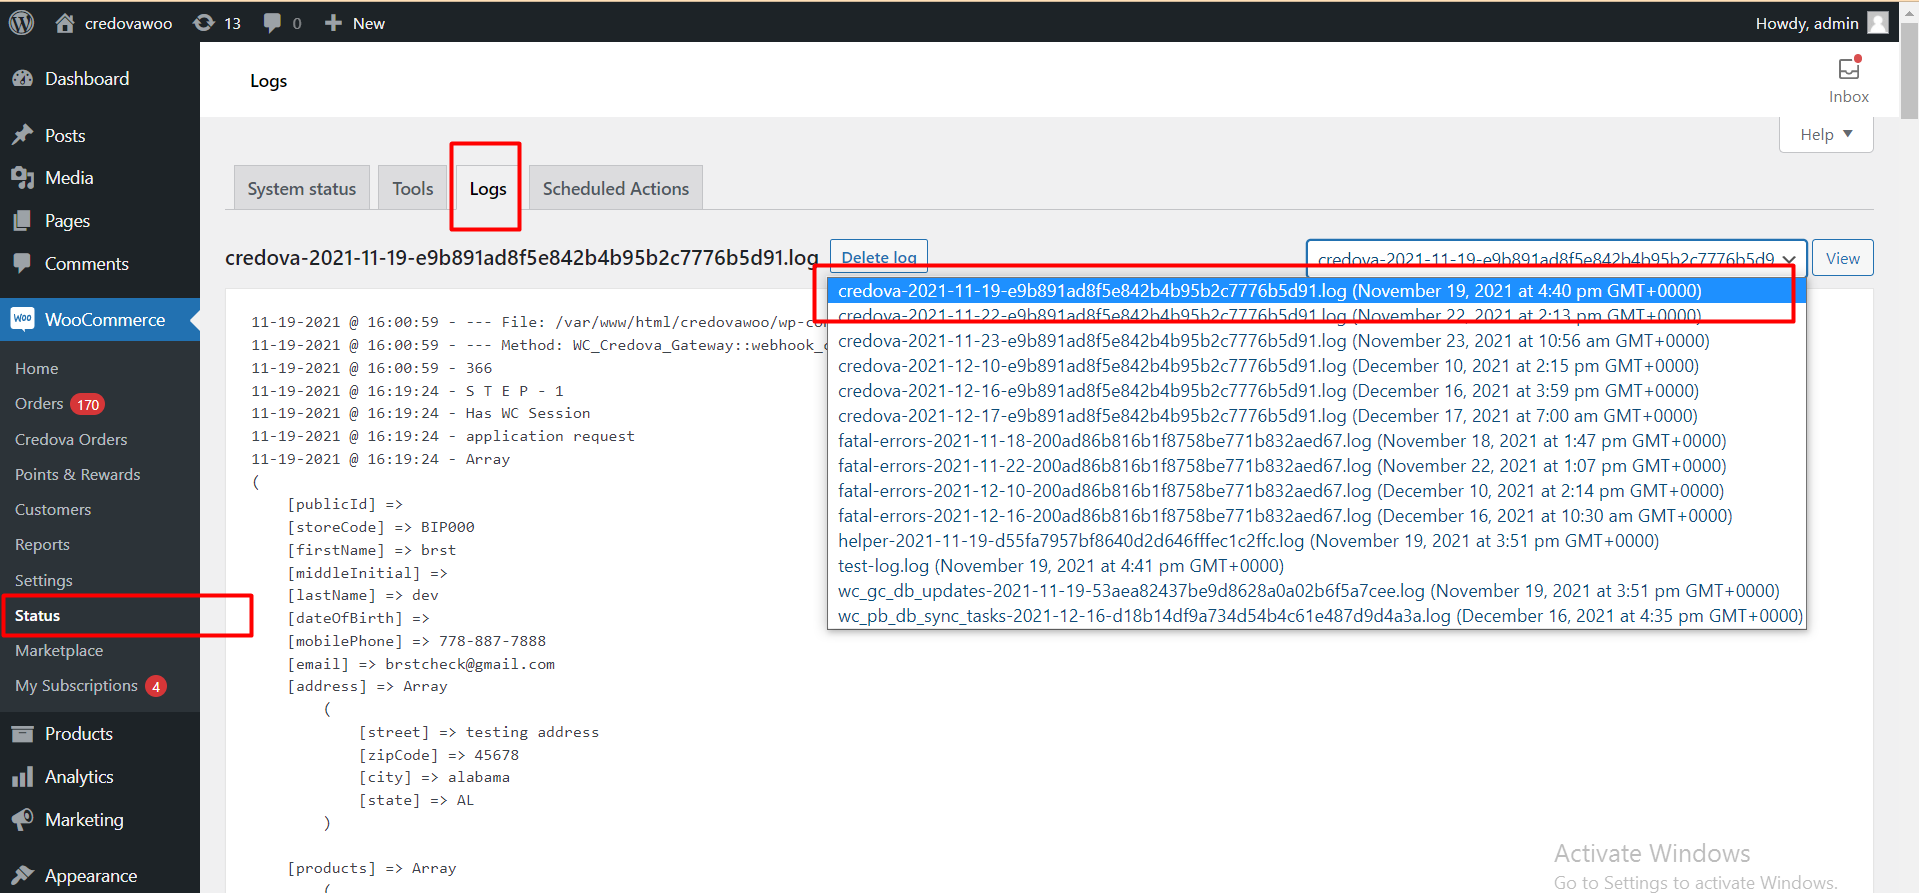
Checking Logs
Best Practices/Reminders
- When transitioning from a staging/sandbox site to production, do not forget to uncheck Enable Test Mode.
- It is not recommended to enable Test Mode when a staging/sandbox site does not exist, i.e., do not operate in sandbox mode on a live site.
- Enable auto-updates so the most up to date plugin available.
- Email integrations@credova.com to let us know when your integration is ready to test, is live on your website, or to ask further questions.