BigCommerce
Installation Guide
Steps to install app from BigCommerce Marketplace
Before you start
If you have a staging or test environment, we recommend installing the app in your test environment first so you can verify functionality prior to launching in your production environment.
The Credova app in the BigCommerce Marketplace has been tested with the Cornerstone Theme. If you are not using the default Cornerstone theme, be aware that some additional support may be required to ensure Credova displays correctly on your site. Please contact integrations@credova.com if you encounter issues after installing the app.
Please review the Testing Integration documentation to verify orders once installed.
Install the App
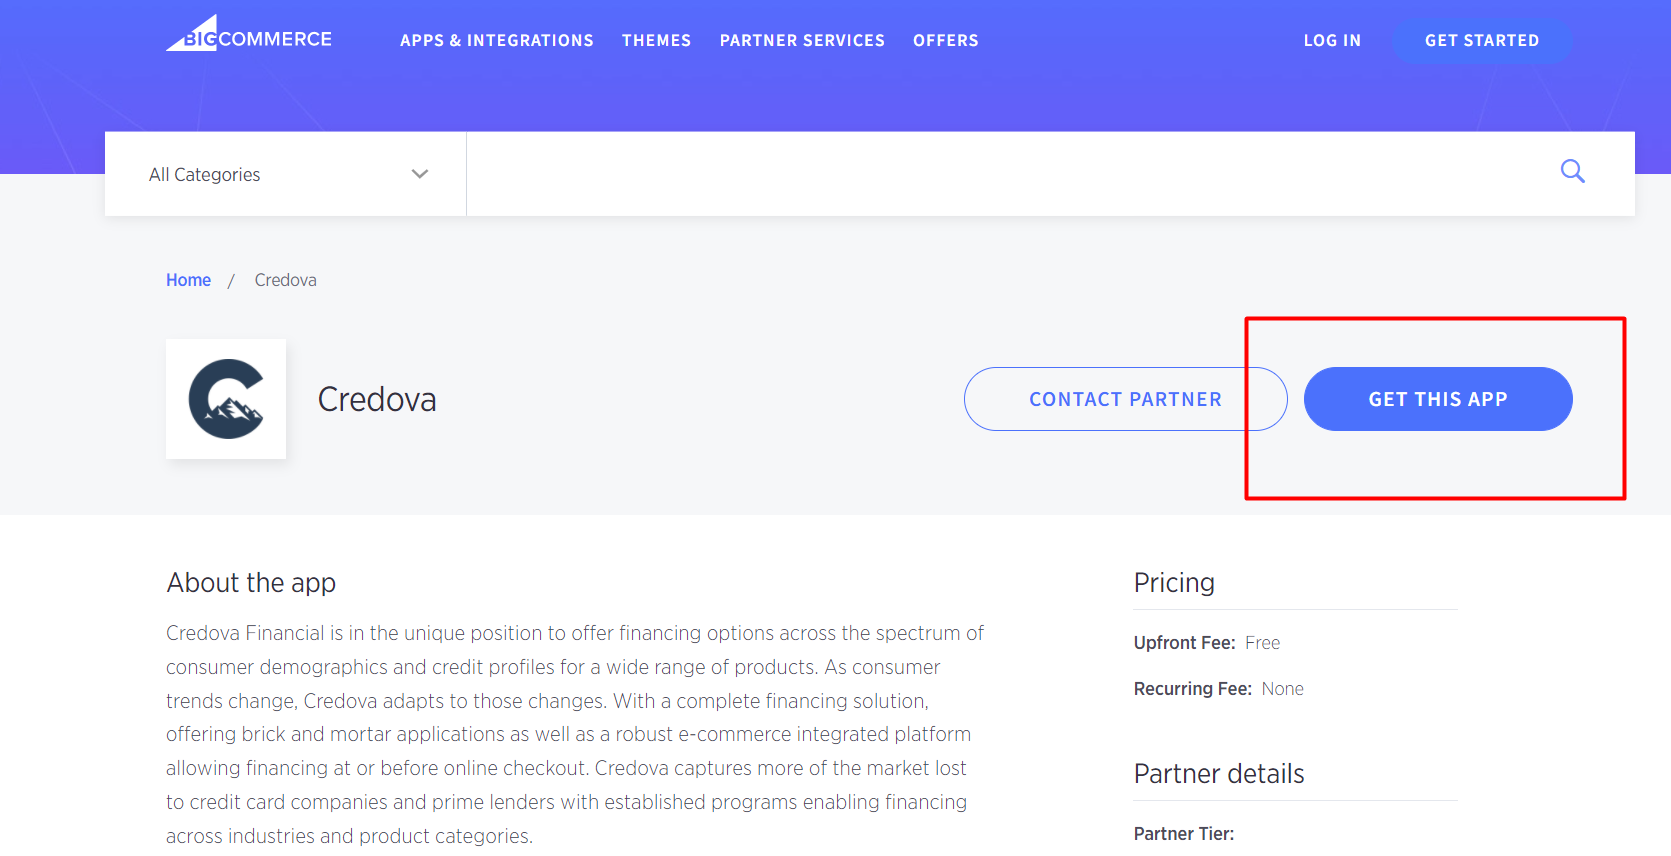
- Navigate directly to https://www.bigcommerce.com/apps/credova/
- Click "Get this App"
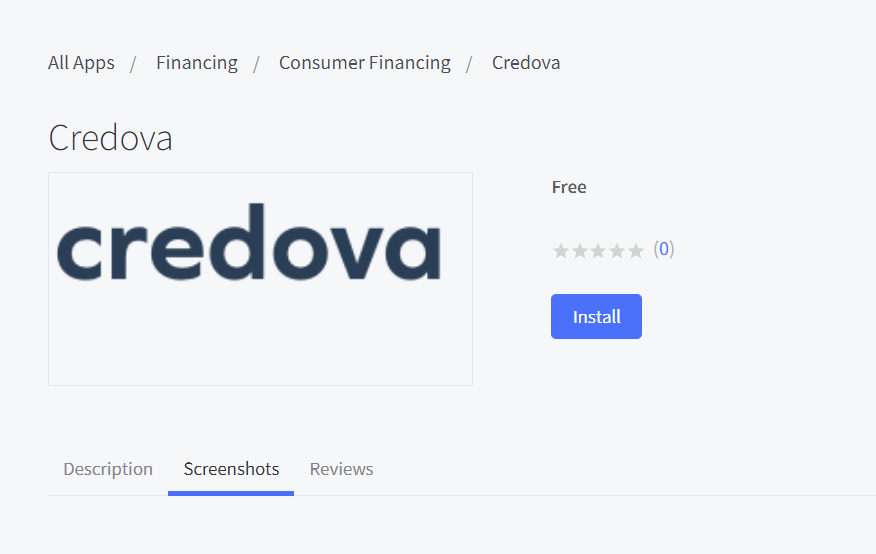
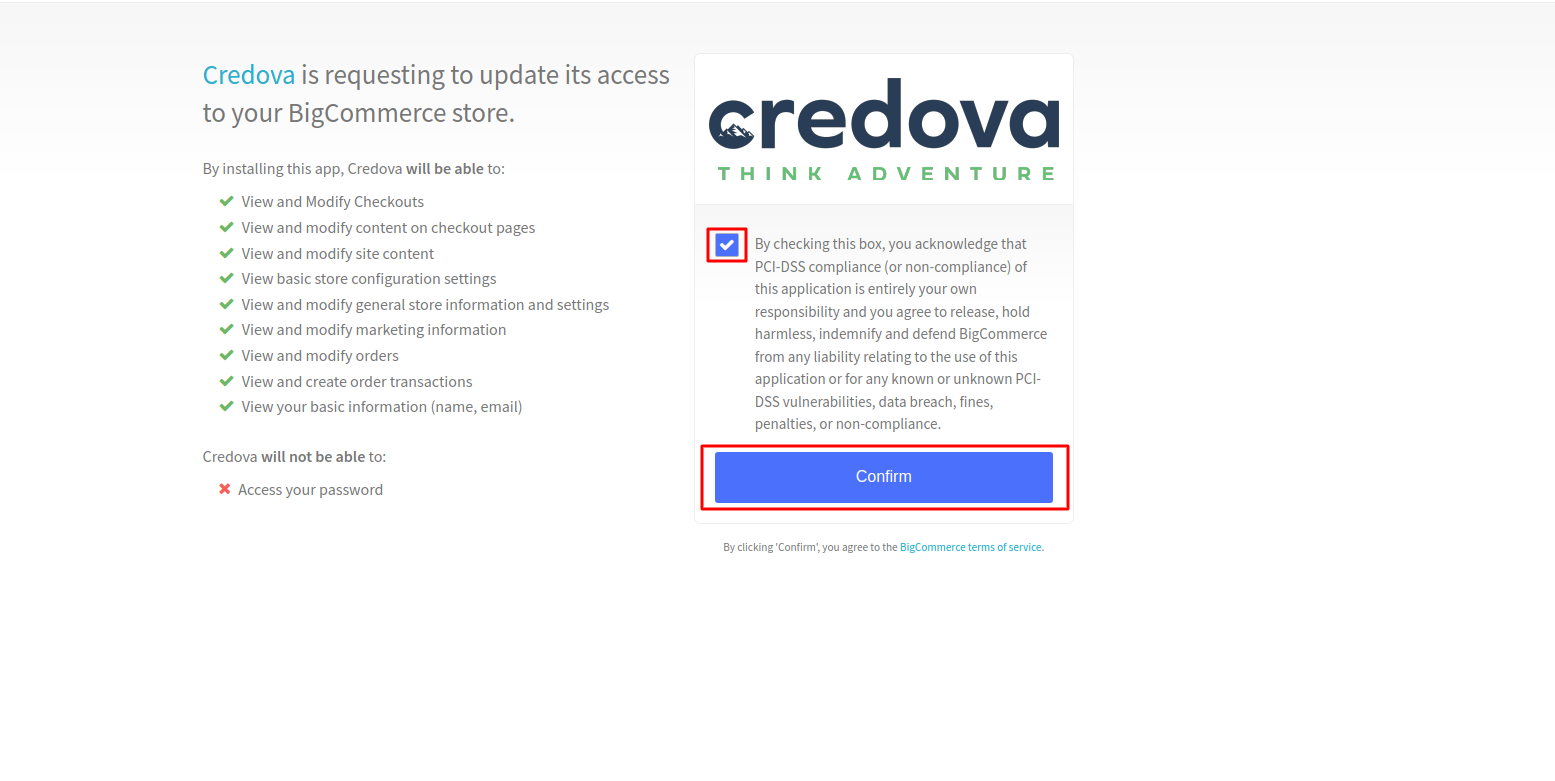
- Click on Install, Acknowledge, and Confirm.
Configure the App
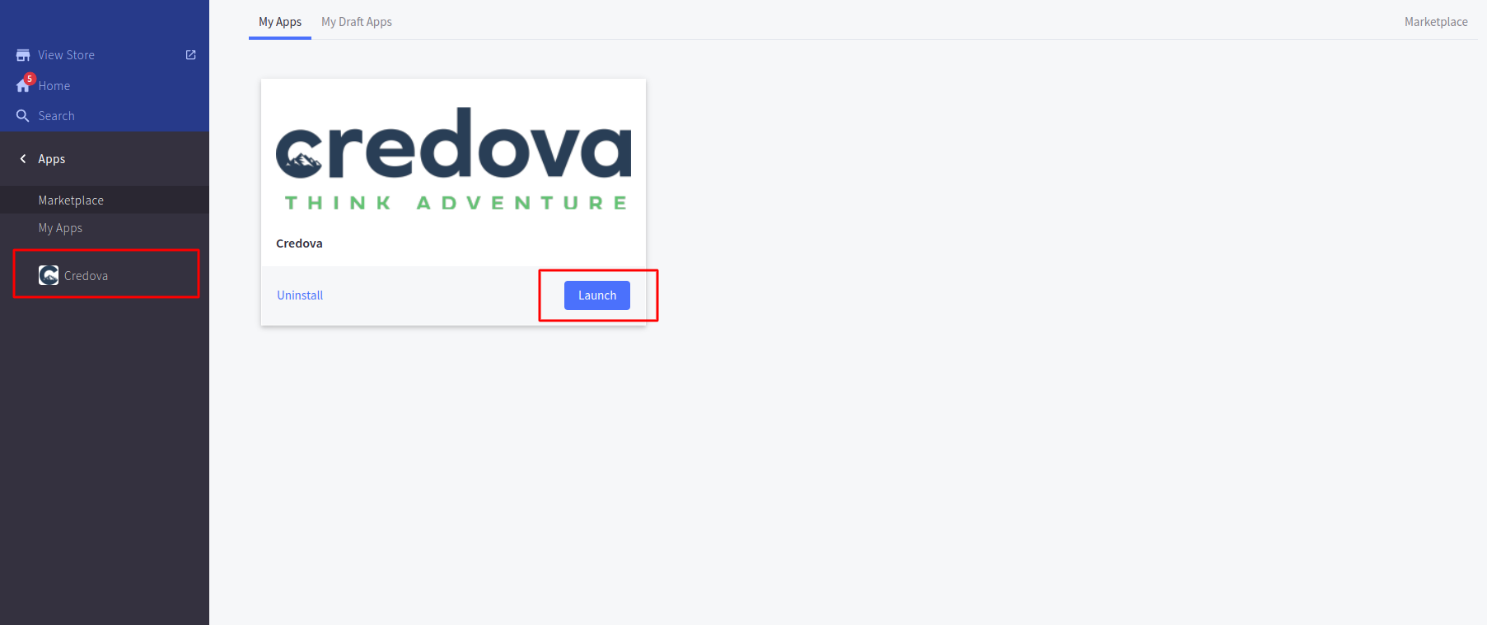
The app will be located in your Apps section. Click Launch.
- You will see the payment configuration screen. Add all your configurations and save changes. The description and recommended values are defined in the table below:
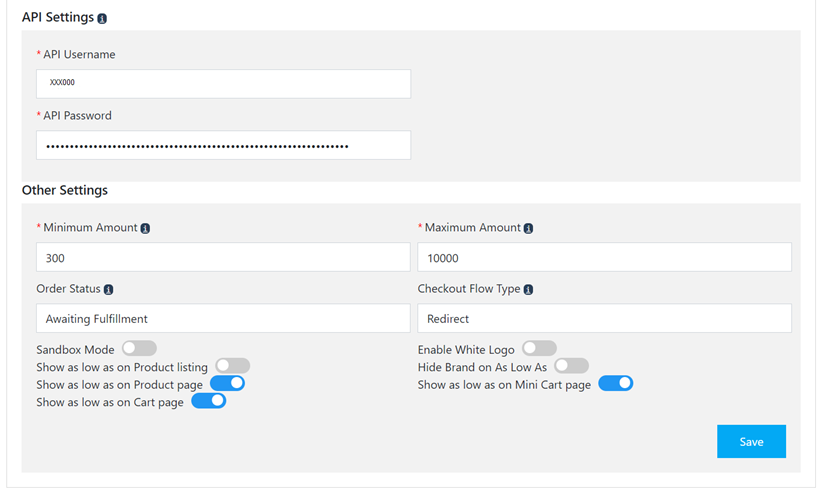
| Setting Name | Setting Value & Description |
|---|---|
| API Username | A combination of 6 alpha/numeric characters. The username can be found here: https://lending.credova.com/ApiIntegration/Credentials |
| API Password | A random mix of 64 alpha/numeric characters and symbols. The API password can be found here: https://lending.credova.com/ApiIntegration/Credentials |
| Minimum Amount | Default is $300 Credova will not display on products less than this dollar amount, but Credova will be displayed on items as low as $50. Please check with your Credova representative to verify your minimum amount if you’re unsure. |
| Maximum Finance Amount | Default is $5000 Credova will not display on products greater than this dollar amount. Credova currently does not finance anything over $10,000 but can be displayed on items above this amount. Please check with your Credova representative to verify your maximum amount if you’re unsure. |
| Order Status | Choose how you want the order to be displayed in BigCommerce. Both statuses confirm a completed checkout process and signed contract with Credova.
|
| Checkout Flow Type | Redirect is the recommended option. This will redirect the customer to the Credova server to complete the checkout process. Upon completion the consumer will be redirected to a completed order page or the cart if they do not complete the financing option. Modal opens Credova in a popup overlayed on the retailer website. |
| Sandbox Mode | Enabled While in testing on sandbox/staging environment. Disabled when on live site. |
| Enable White Logo | Provides the ability to use a white Credova logo when site background is a dark color. 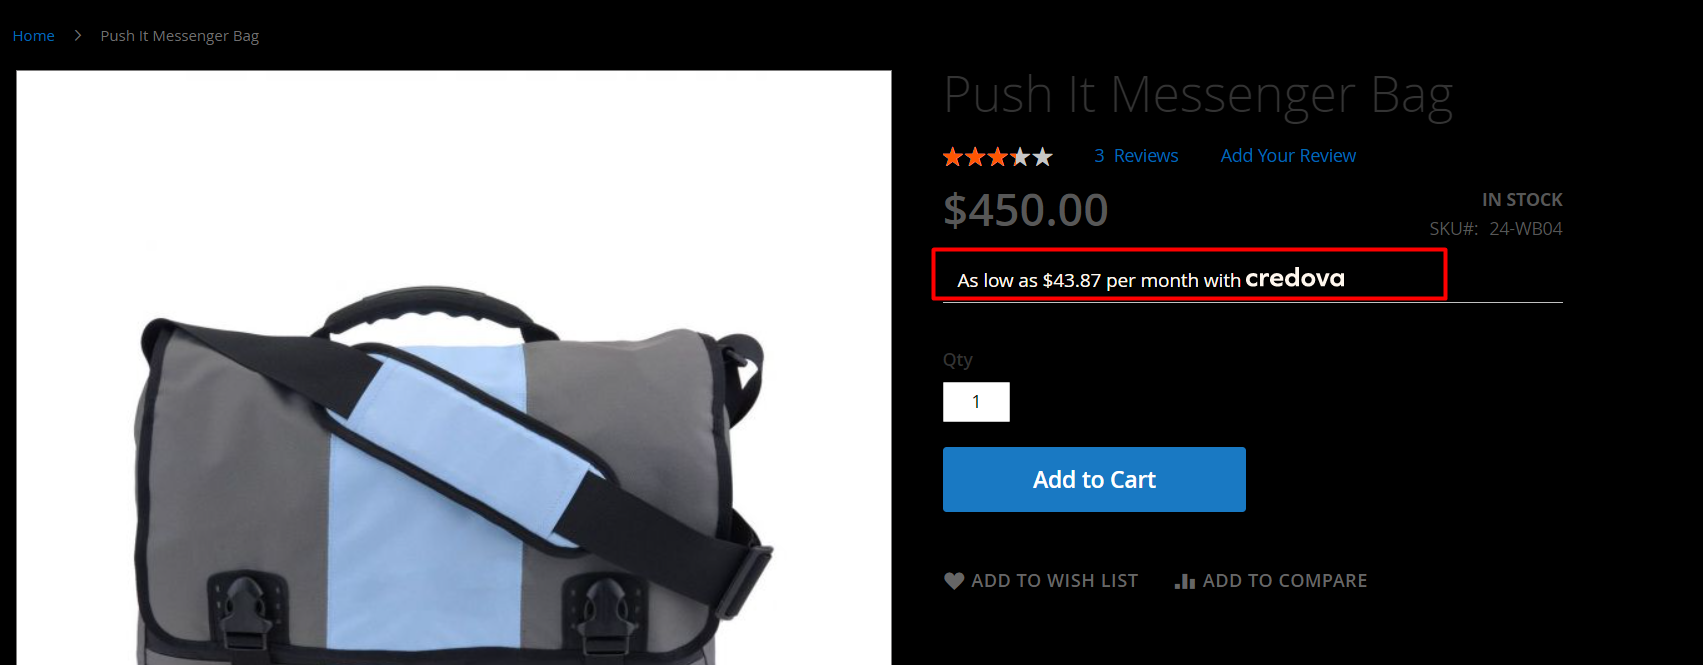 |
| Show as low as on product listing | Enabled This will show Credova on product listing pages (PLP) when the product price is between the minimum and maximum settings. |
| Hide brand on as low as | Disabled Unless you prefer to not display Credova branding on product listing and product detail pages. |
| Show as low as on Product page | Enabled This will show Credova on product detail pages (PDP) when the product price is between the minimum and maximum settings. |
| Show as low as on mini cart page | Enabled This will show Credova on the mini cart view. |
| Show as low as on cart page | Enabled This will show Credova in cart before checkout. |
Configure Credova at Checkout
-
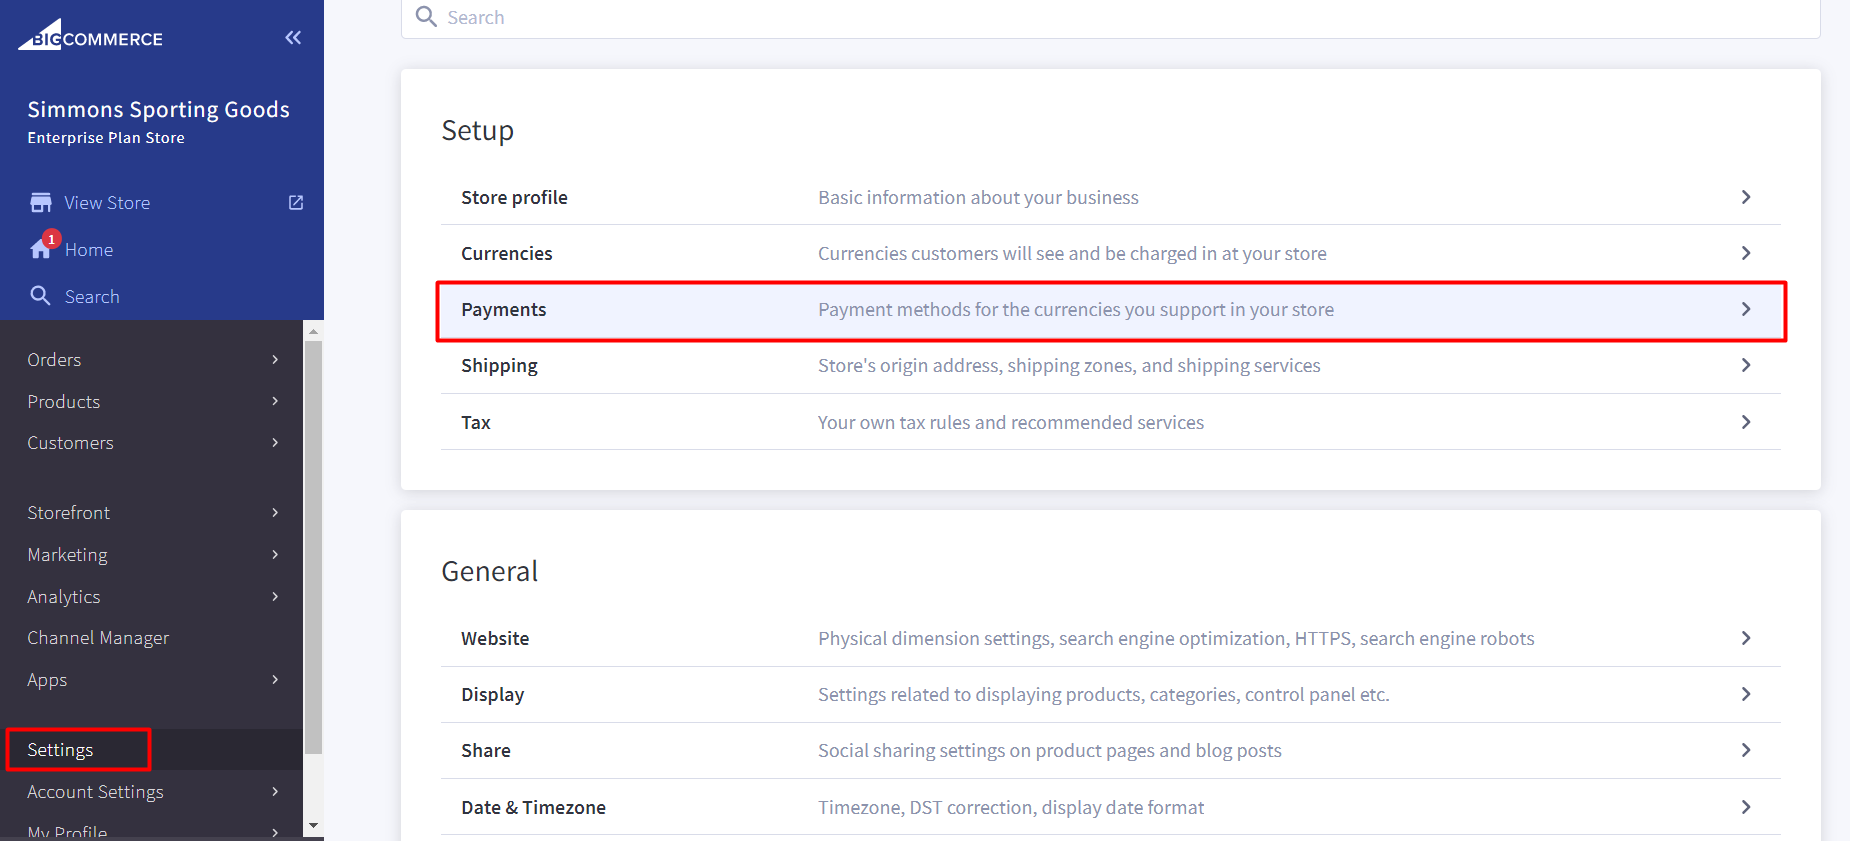
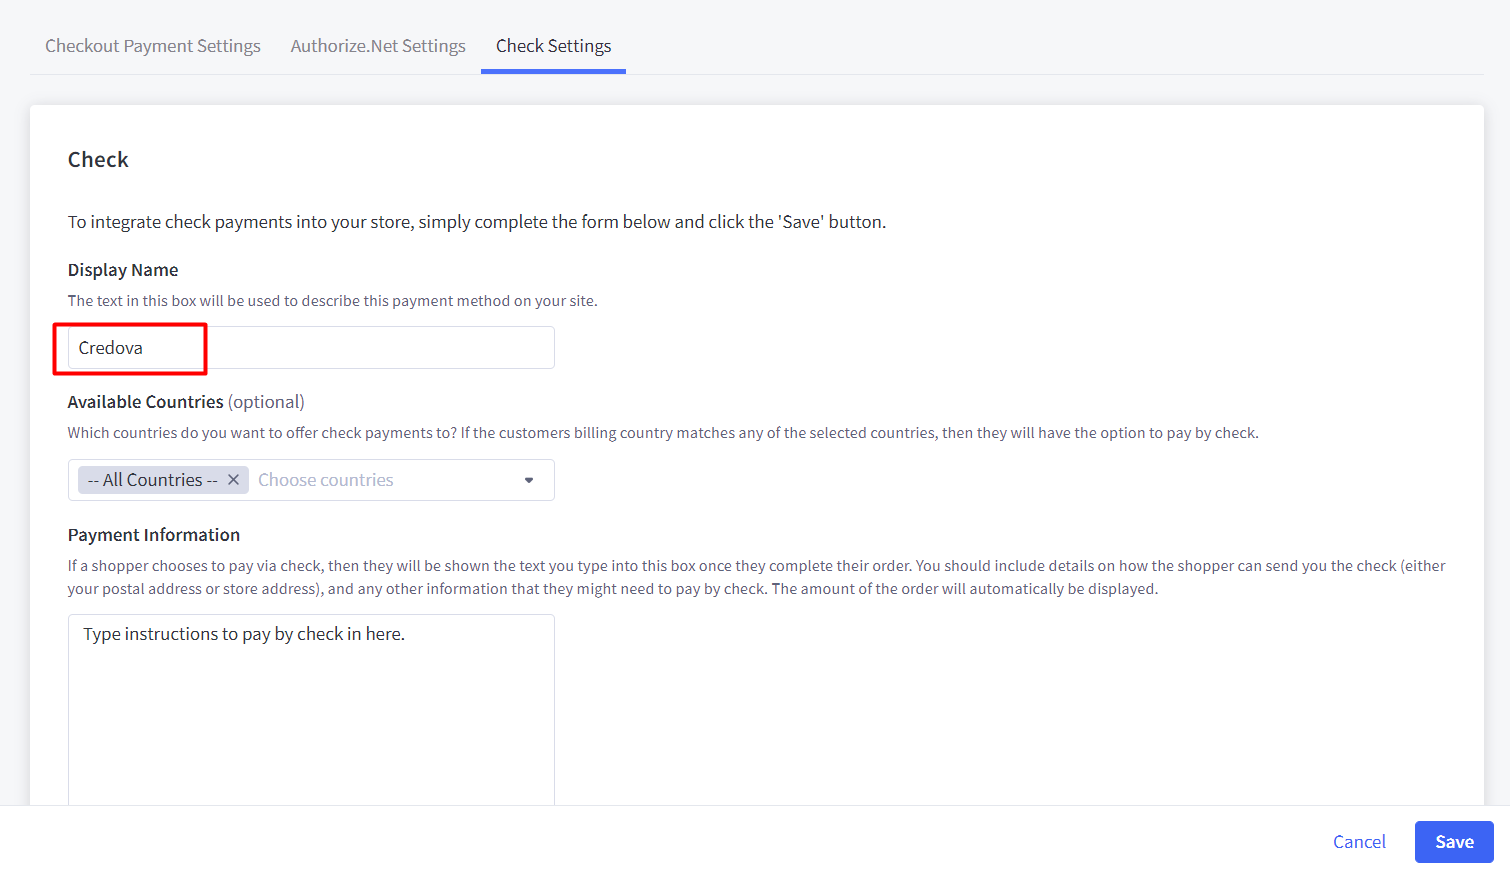
Go to Settings ➝ Payments (under Setup)
-
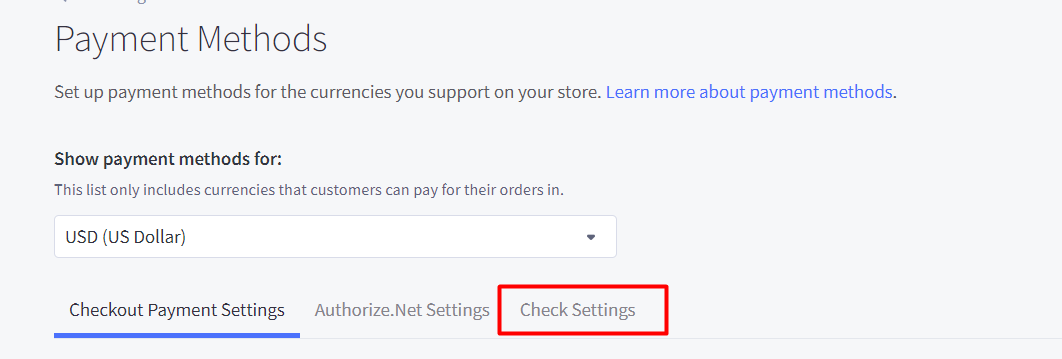
Click Check Settings
-
Type Credova in Display Name and click Save.
-
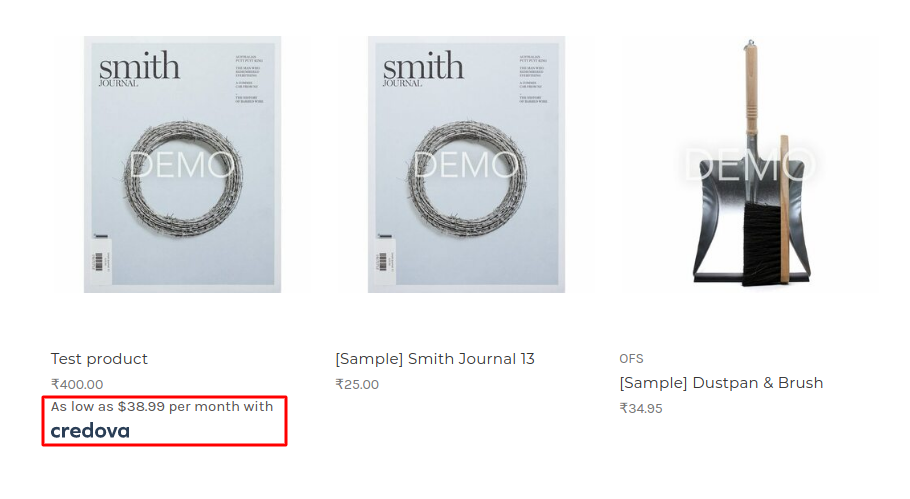
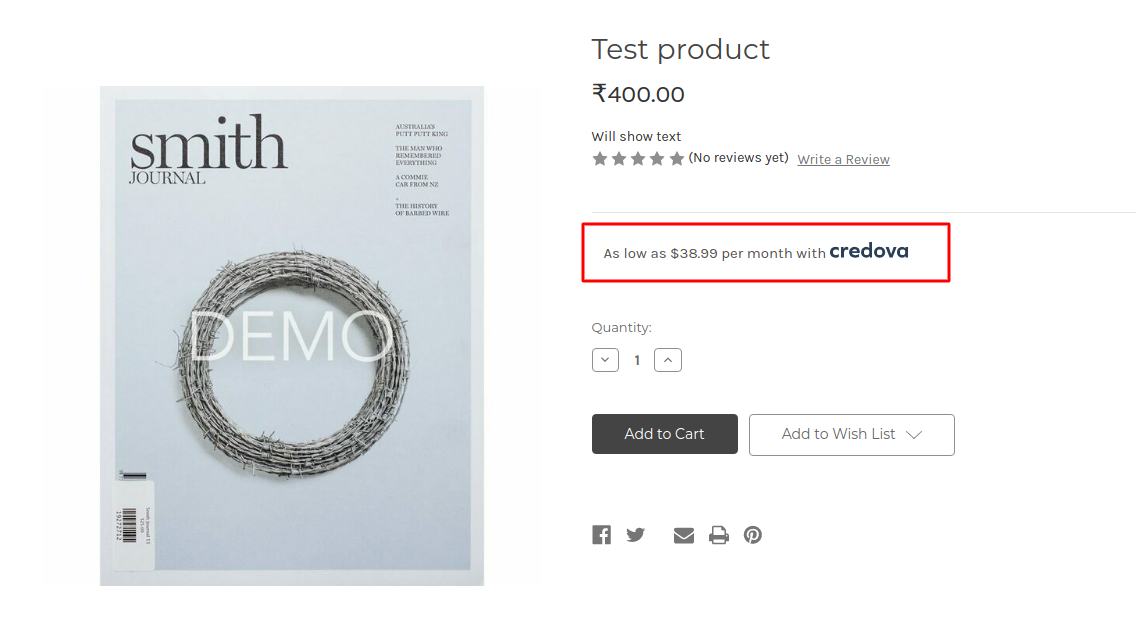
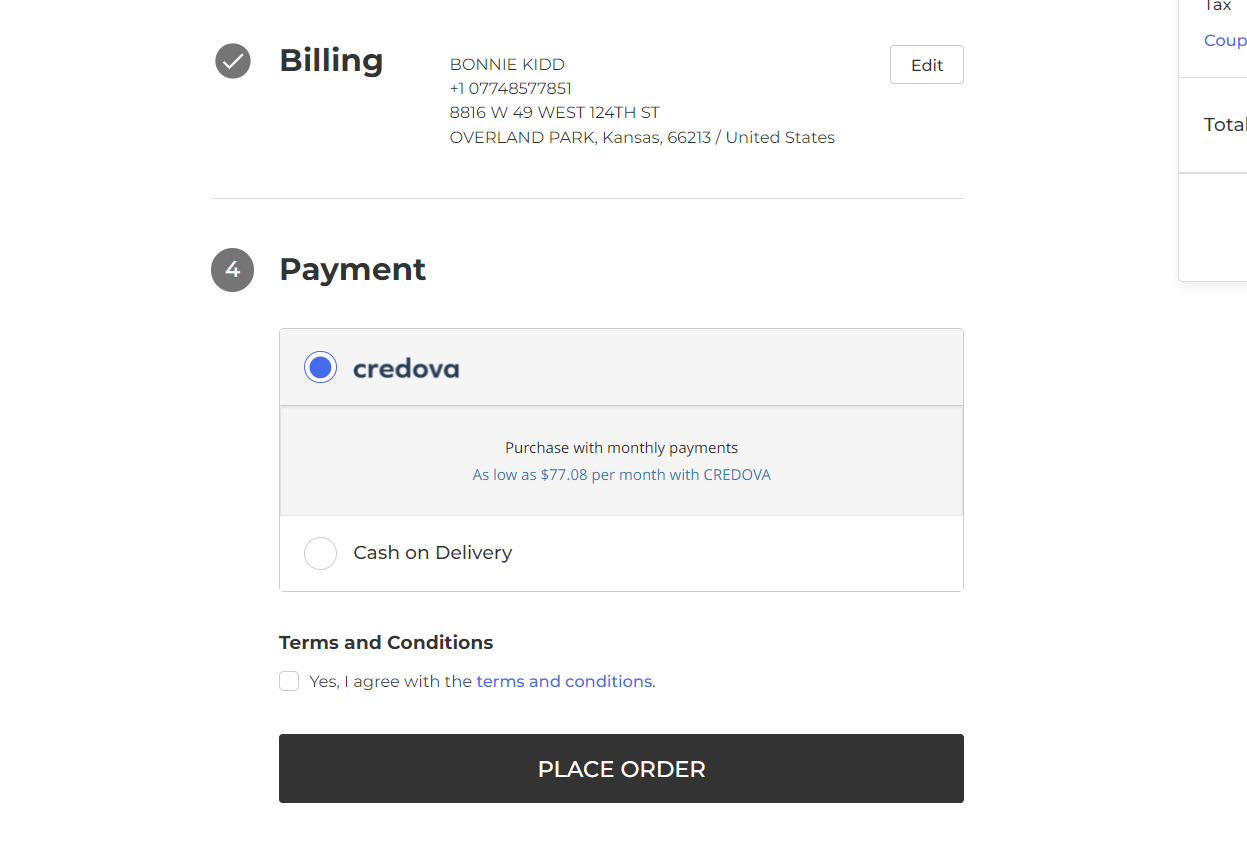
At this point, you have completed the app configuration and set up in the backend of BigCommerce. An example of the Listing page, Product Page View, and Checkout is included below as reference. If enabled, you should Credova on these pages.

Excluding/Blocking Products
There are specific products that are not eligible for use with the Credova financing option, such as gift cards. Additionally, as a retailer you may decide to exclude specific products from using financing.
In either case, these products can be blocked from (1) displaying the Credova financing as-low-as (ALA) display on the product on listing pages and/or (2) from removing Credova as a payment option at checkout when they are included in the customers cart. For prohibited items Credova should never be displayed at checkout.
Excluding specific products at checkout and/or product display is accomplished using the Credova Payment Configuration as shown below.
- Go to Apps ➝ Credova and click on Exclude Products.
- Begin by typing in the product ID (typically the SKU).
- Disable Credova for the product on the product listing and details page.
- Disable Credova at checkout for restricted products.
- After adding all excluded products be sure to save.
Products can be added or removed from this list at any time.

Additional customization for themes
If you are using a theme other than Cornerstone, you may be required to manually set the ALA settings in the Credova payment configuration. The so-called product and category selectors can be configured within the Credova App.
You can identify the theme being used by going to Storefront ➝ Themes. It will display the current theme being used in your store.
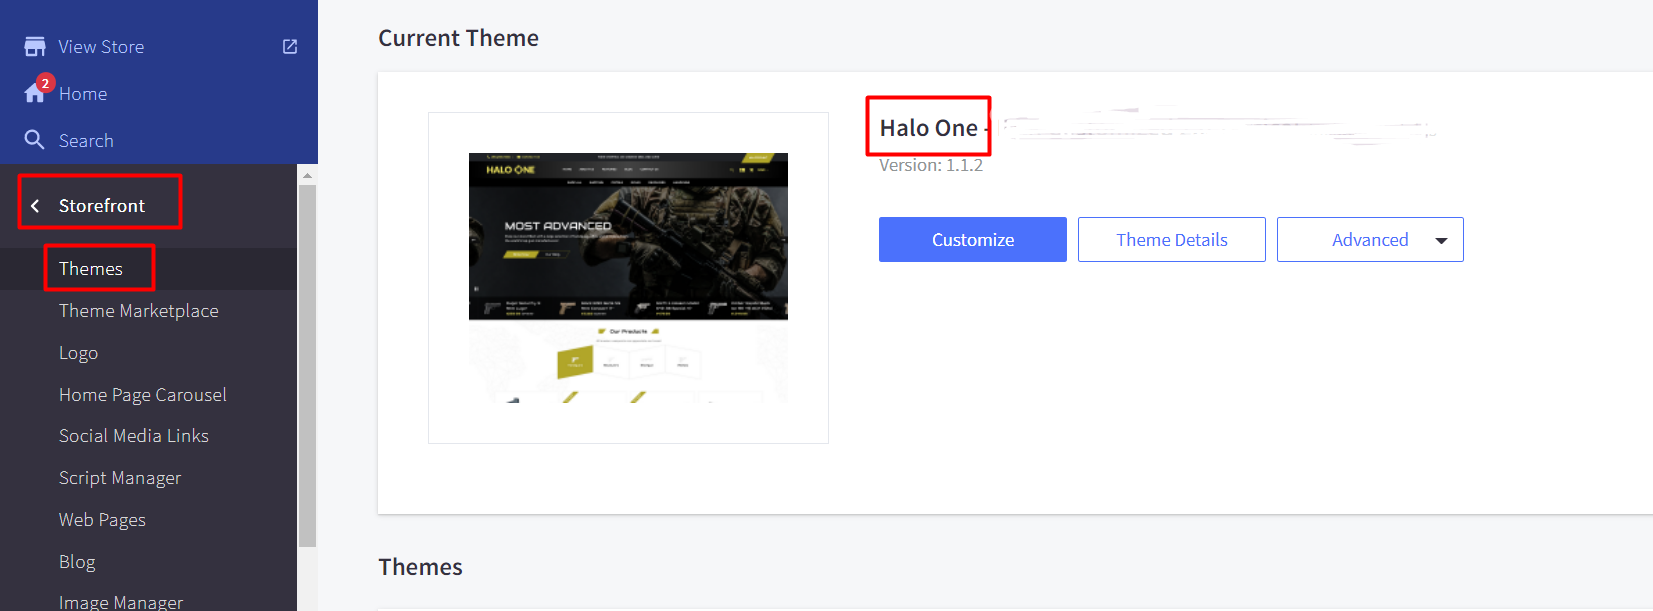
- If you are not using Cornerstone theme, you will need to activate the Custom Site Theme option. This can be done by going to Apps ➝ Credova ➝ clicking on ALA Settings.
- Enable the Custom Theme toggle if Cornerstone is not your store’s theme.
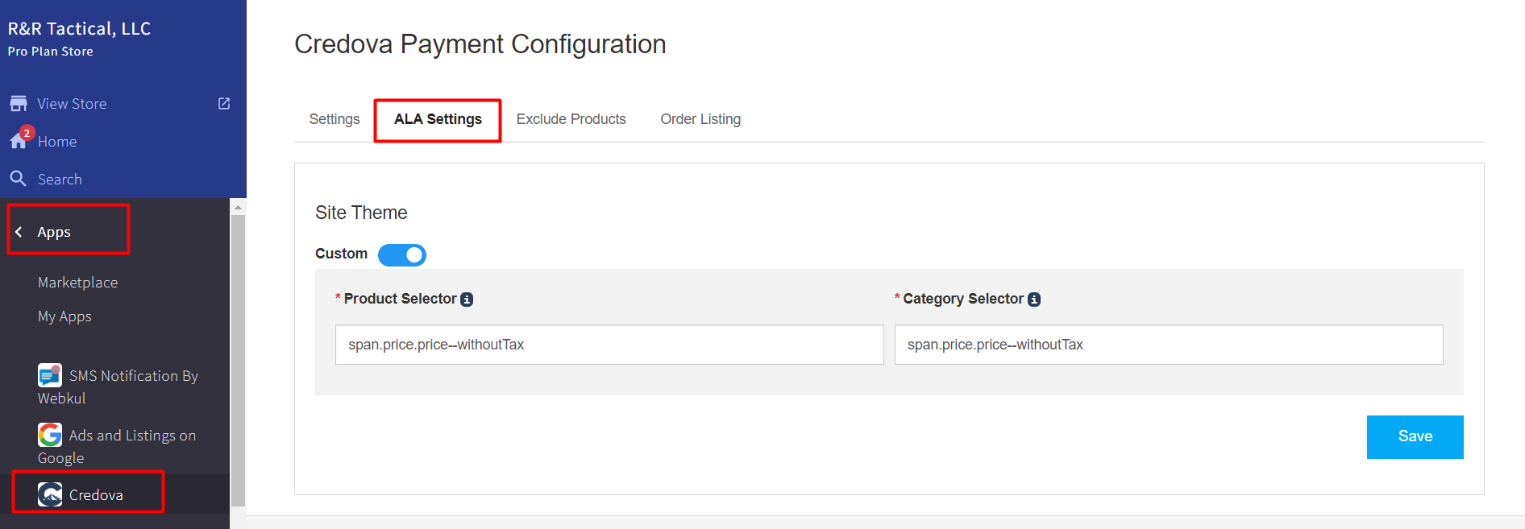
- Copy and paste the Product Selector and Category Selector in the appropriate fields. You can find the selectors by following along with the screenshots below.
What is a Product Selector?
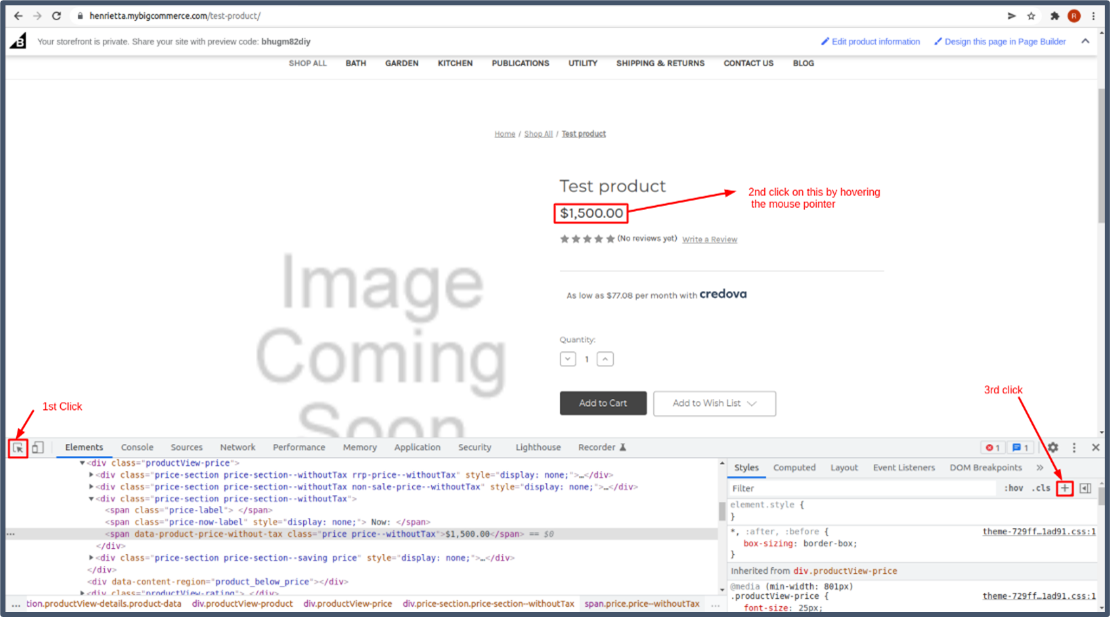
A user can find the product selector from the product. This is basically a class name which the user can get from inspecting a single product page.
-
Open a product detail page of your site. Right Click and choose Inspect.
-
From the Inspect view, click on the areas following the numeric sequence in the screenshot below until you get to 4 where you will copy the highlighted text to paste it into the product selector field in the ALA settings.
-
Paste the copied text into the product selector field.

What is a Category Selector?
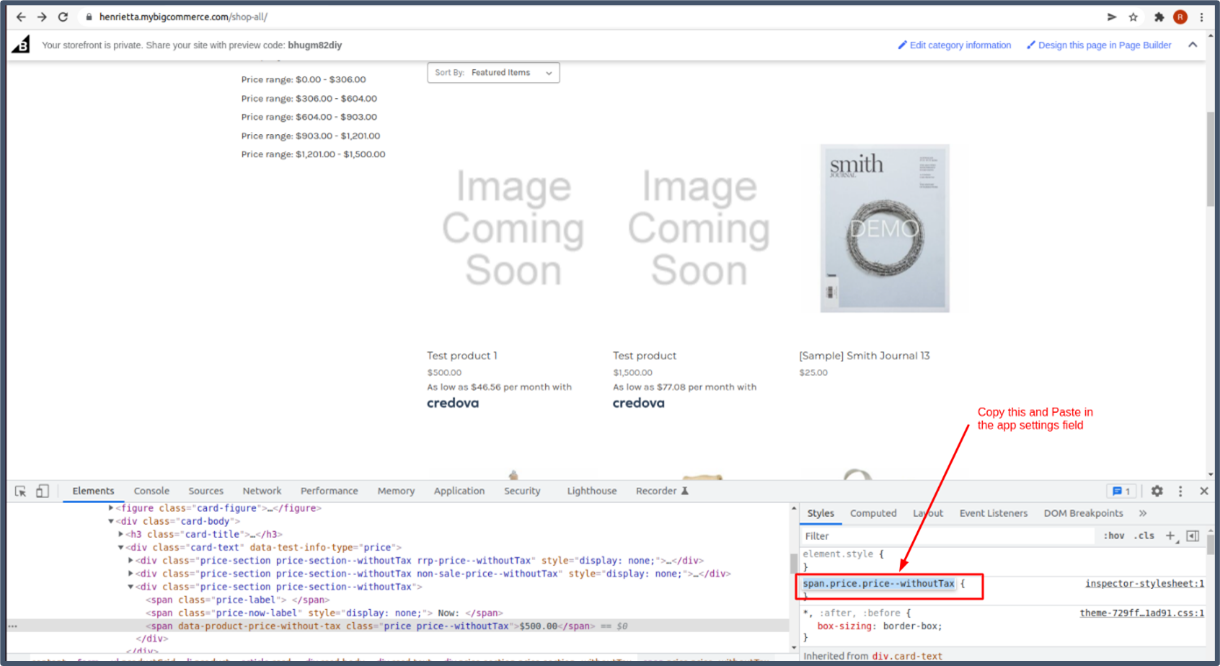
The user can find Category selector from Shop/Category page. This is basically a class name that can be obtained from the Store/Category page.
-
Open the category page, right click and choose inspect.
-
From the Inspect view, click on the areas following the numeric sequence in the screenshot below until you get to 4 where you will copy the highlighted text to paste it into the product selector field in the ALA settings.
-
Paste the copied text into the Category selector field and click save.

Orders and Returns
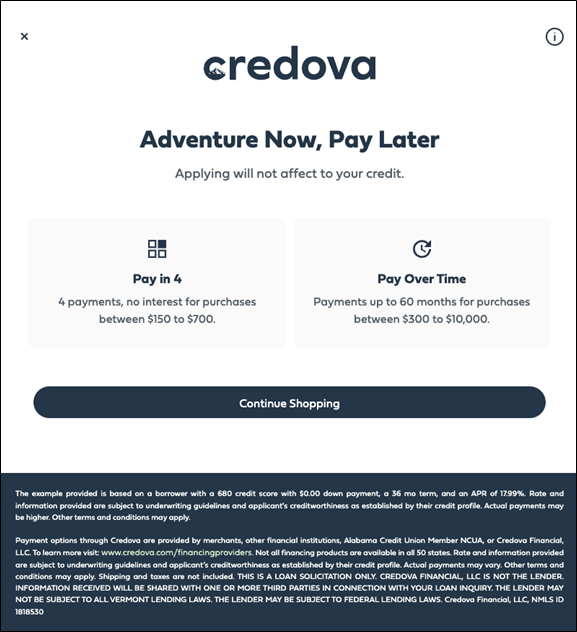
Customers will see a prequalification pop up when clicked on any of the areas Credova is displaying on the website.
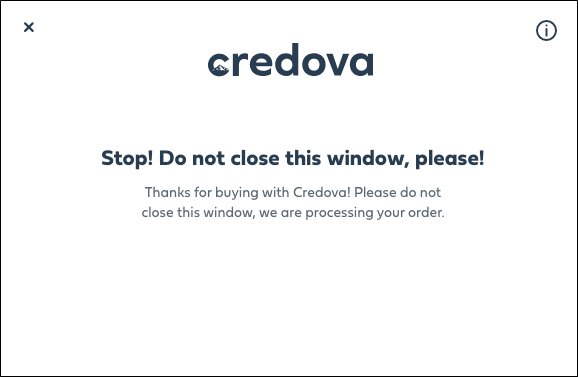
Once checkout is complete with Credova, customers will receive a confirmation pop up
Orders
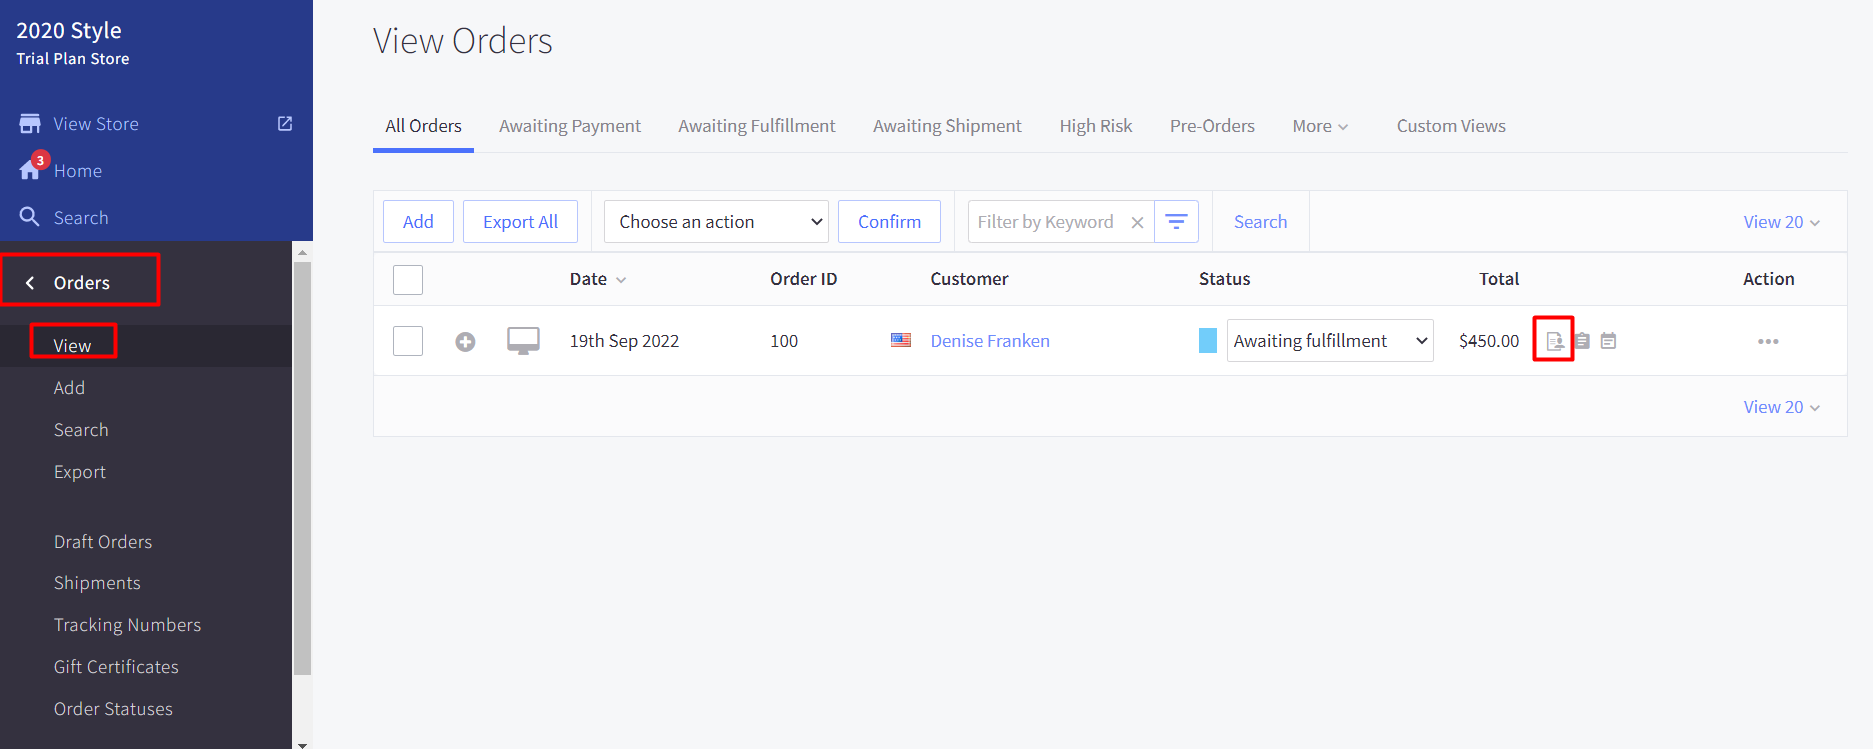
Orders financed through Credova will display where all your orders display. Based on the selected order status in the configuration, a Credova order will display as either Awaiting Fulfillment or Awaiting Payment.
Staff Notes
Orders ➝ View ➝ This order has staff notes
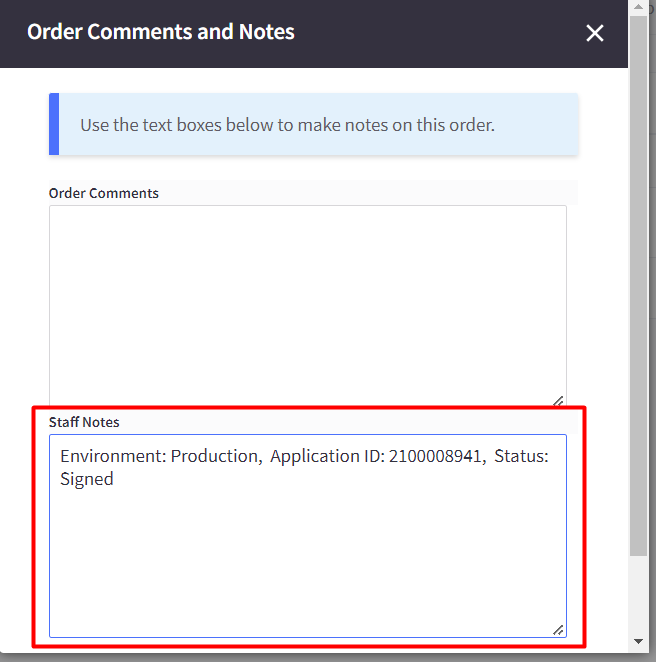
Valid orders financed through Credova will contain 3 important items in staff notes:
- Environment
- Valid orders must include Environment: Production.
- Orders containing Environment: Sandbox are NOT valid orders.
- Application ID
- Application ID includes a 10 digit number that should match the ID in the Credova portal.
- Status
- Status: Signed indicates a valid order. Any other status does not indicate a valid order financed through Credova.

Credova Orders
We also display Credova orders within the Credova App.
Apps ➝ Credova ➝ Order Listing
Here you will see all attempts by customers to place an order. If payment status is ‘not set’, the order was not generated with Credova Financing. A payment status with ‘Signed’ means the customer financed their purchase with Credova and it will also be displayed in the Big Commerce Order section. The Big Commerce Order Status will display the selected order status (awaiting payment, awaiting shipment, or awaiting fulfillment) and Application ID will also be populated when there is a signed contract.


Delivery and Refund
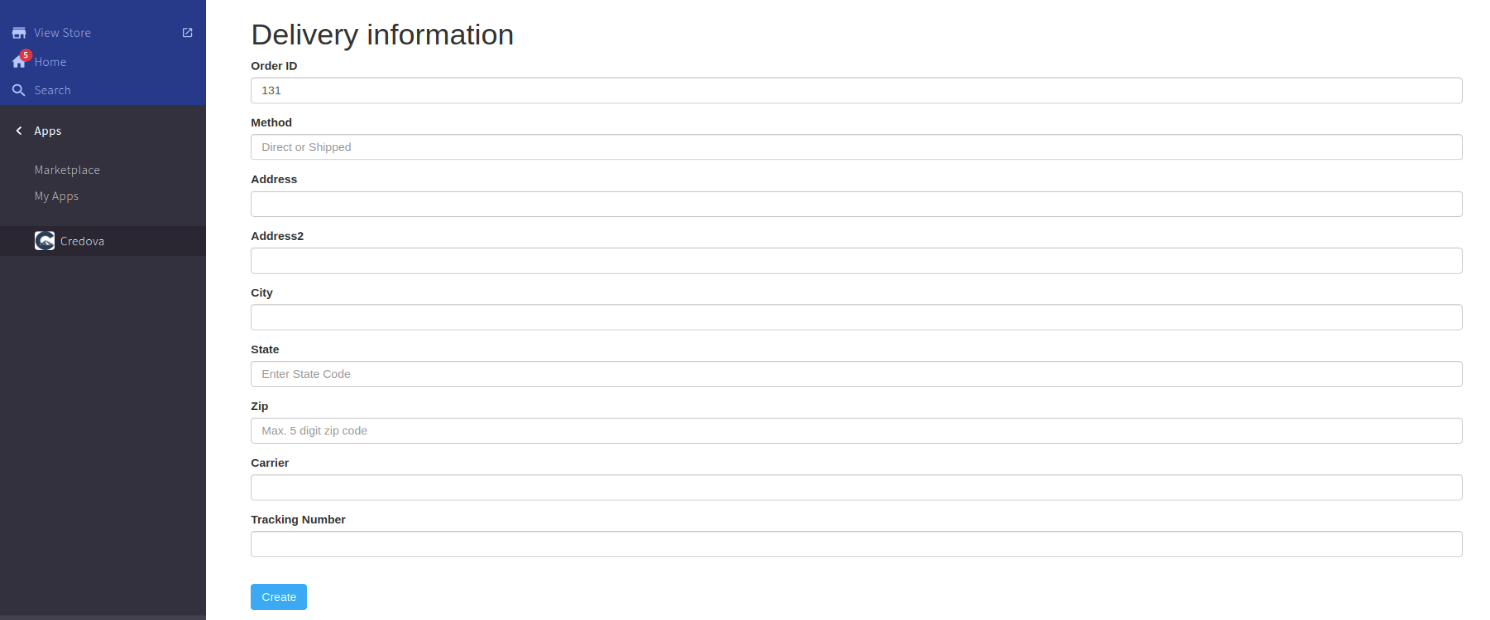
Returns can be generated from the Credova App by clicking Refund.

Refund Process

Under Return Type, select Redraft or Return.
- Return - The customer is returning all products that were purchased with Credova financing. Choose the Return Reason that best suits each return. Their contract and approval with Credova will be cancelled as a result of the return.
- Redraft – The customer wishes to change the products (some or all) associated with the signed contract. In this case the entire contract is canceled but the customer approval is retained. This allows the customer to check out again with a new cart that reflects the updated cart contents. This can be viewed as a method for to execute a partial return, and thus requires a redraft of the contract with the updated financed amount and products that the customer kept. To avoid an issue with an unsigned contract Credova Administrators can create a duplicate application for the customer and create a new contract to be signed. Once the new contract is signed the old contract can be canceled.
Please note: All refunds are handled through the Credova ACH process. Under no circumstance should a refund or cash be given to the customer.
Best Practices/Reminders
- When transitioning from a staging/sandbox site to production, do not forget to disable Sandbox Mode.
- It is not recommended to enable Sandbox Mode when a staging/sandbox site does not exist, i.e., do not operate in sandbox mode on a live site.
- Email integrations@credova.com to let us know when your integration is ready to test, is live on your website, or to ask additional questions.